Creating a sustainable arts practice from nature...
My foraging so far has mainly been for food, health and natural beauty products . Gathering picking then creating recipes to eat, medicines to take and creams and balms to apply.
This left me with waste products of squeezed berries, chopped up leaves and trimmings of all types. As I am trying to evolve my arts practice and incorporate these acts and rituals into my making. As someone who uses all forms of creation within their practice, it is becoming obvious that I now need to look at the materials I am using to create work with.
When I am left with waste produce or pickings now, I am going to be looking at how these can be reused, to create inks, watercolours, oils and building or drawing implements. As I hope to buy fewer and fewer “man made chemical materials”
Elderberry Ink
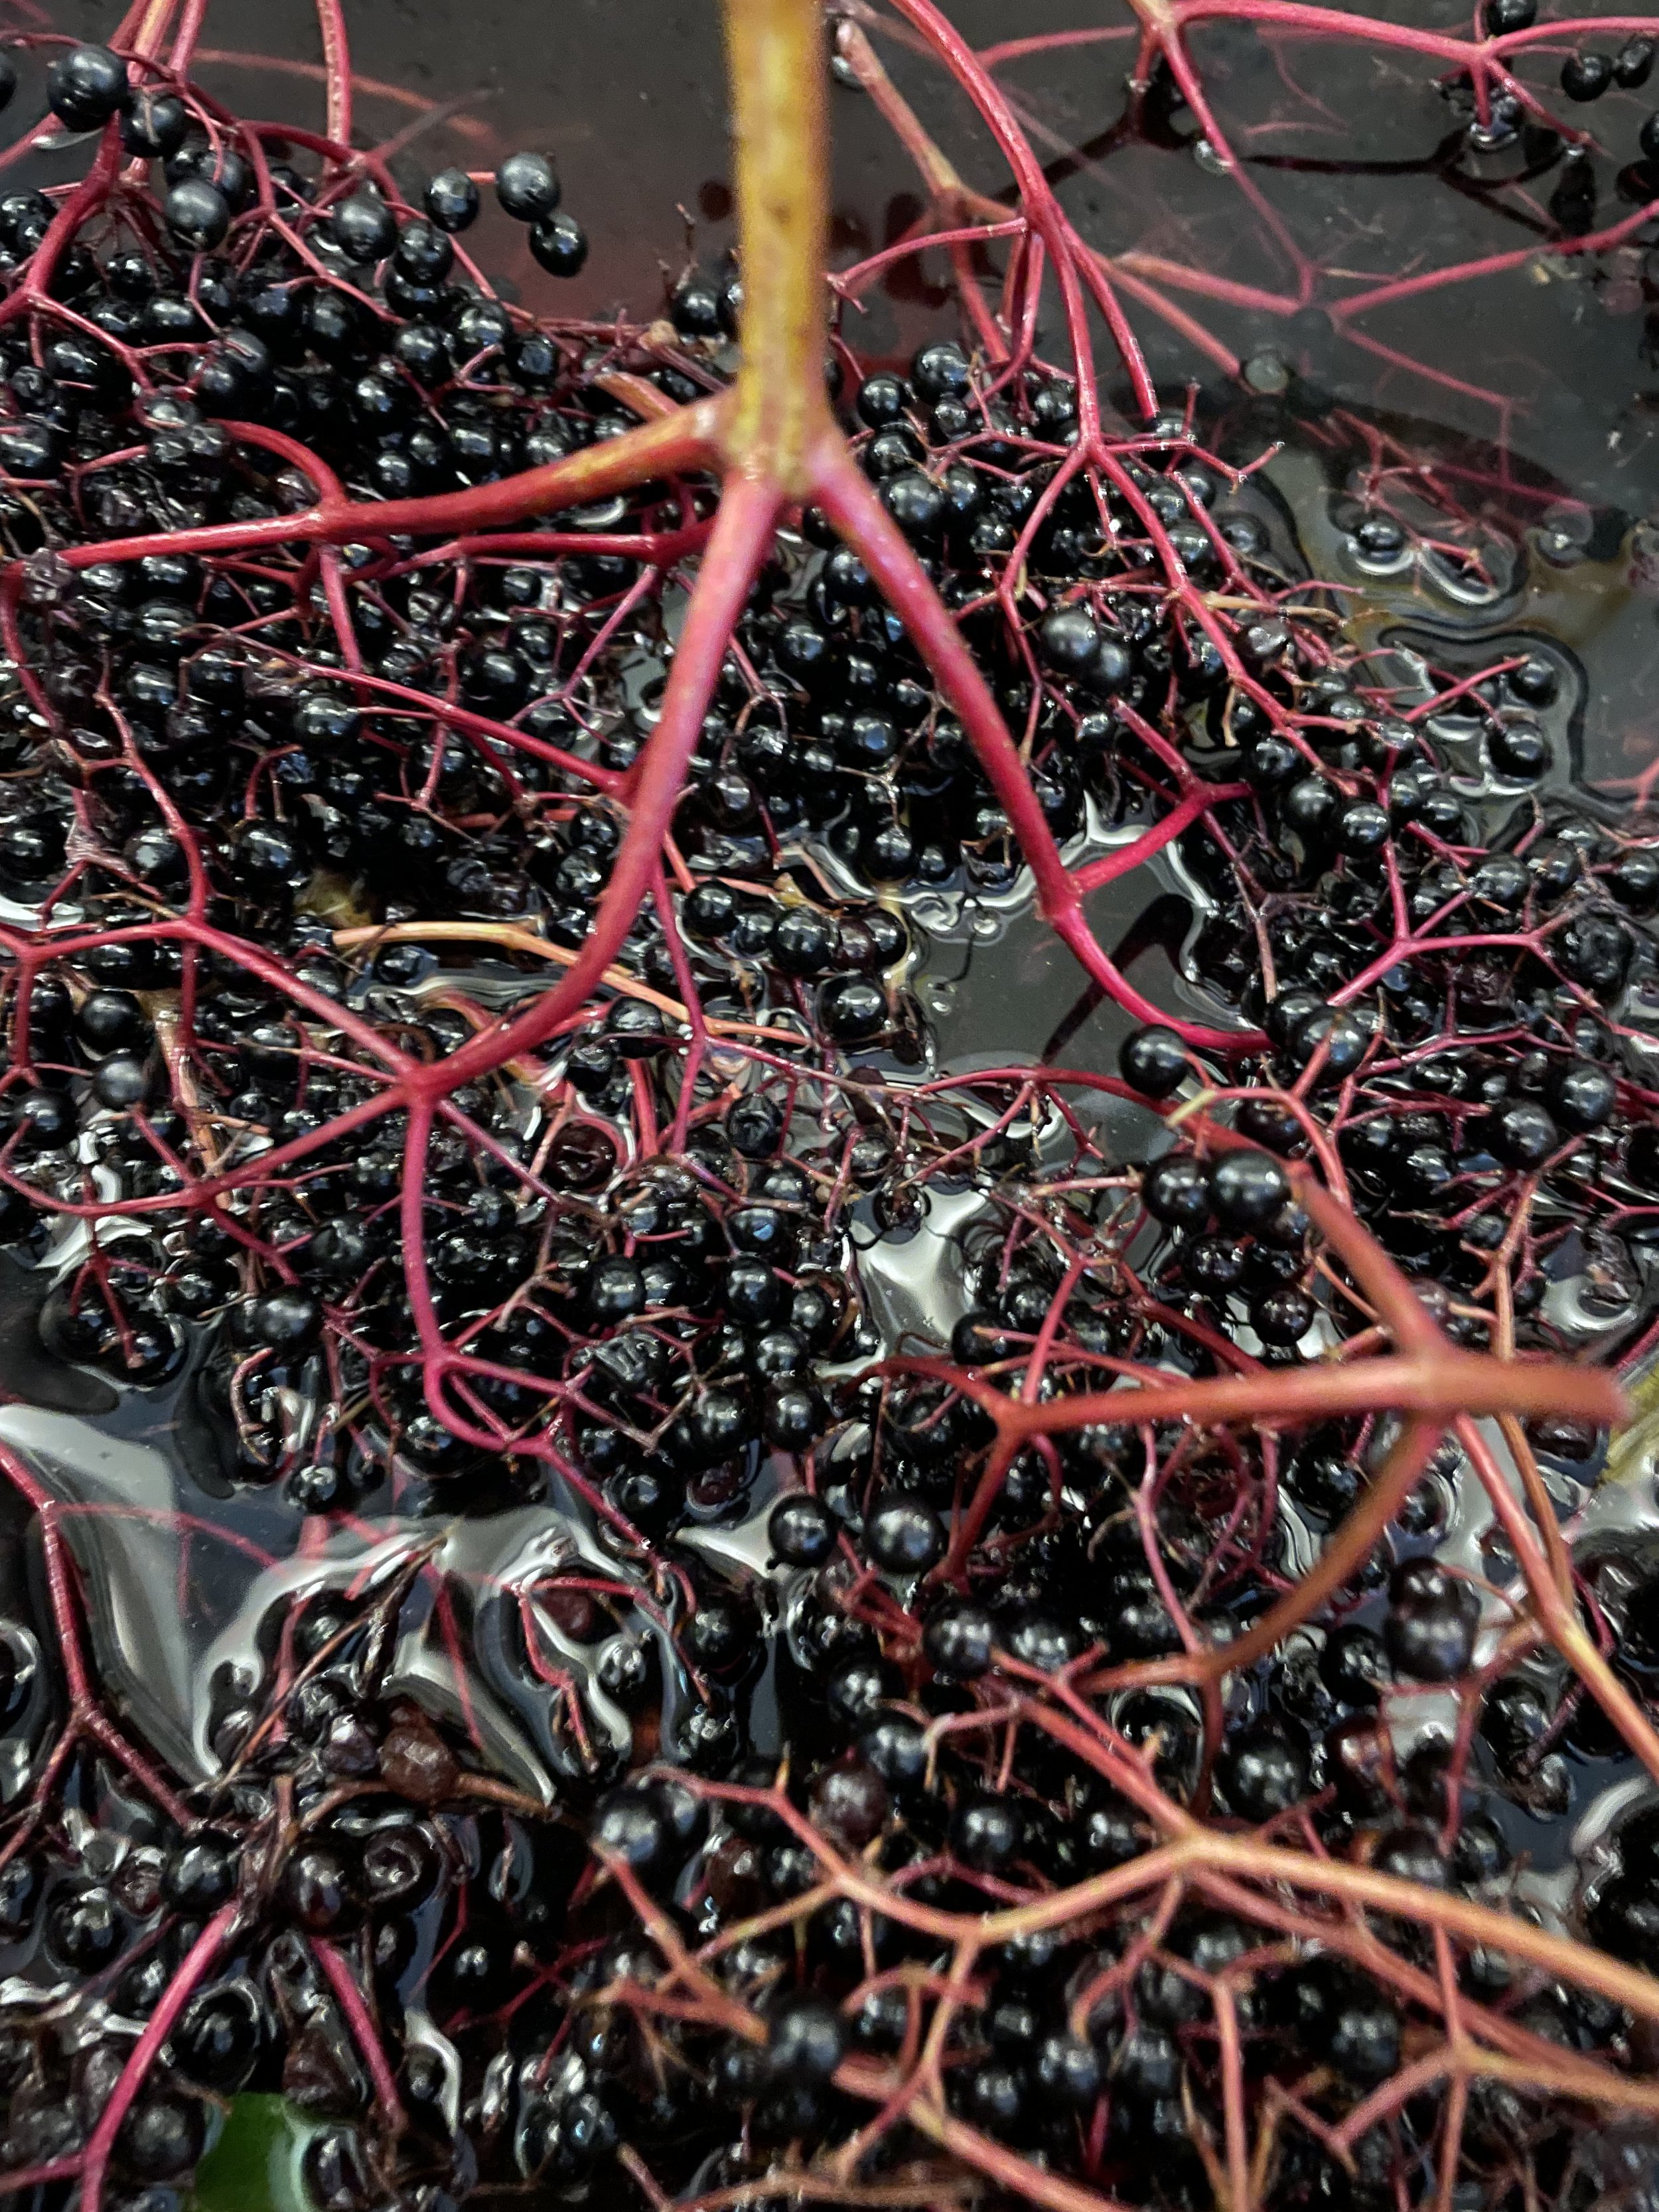
Each year when I gather the elderberries, I am left with a pile of waste crushed berries, the seed are toxic and so should not really been consumed in great quantities. This left me wondering, so after a bit of research I managed to find a formula that seems to work. This means I can reuse these waste berries again, there will always be some waste but not as much, and it means I can dry them out for future use.
The method I used is quite simple. After I have finished squeezing the berries for my edible preparations . I then put them back into the pan on their own to create another extraction of juice.
This juice is much less than previous, but we concentrate it after straining, to create a more intense colour.
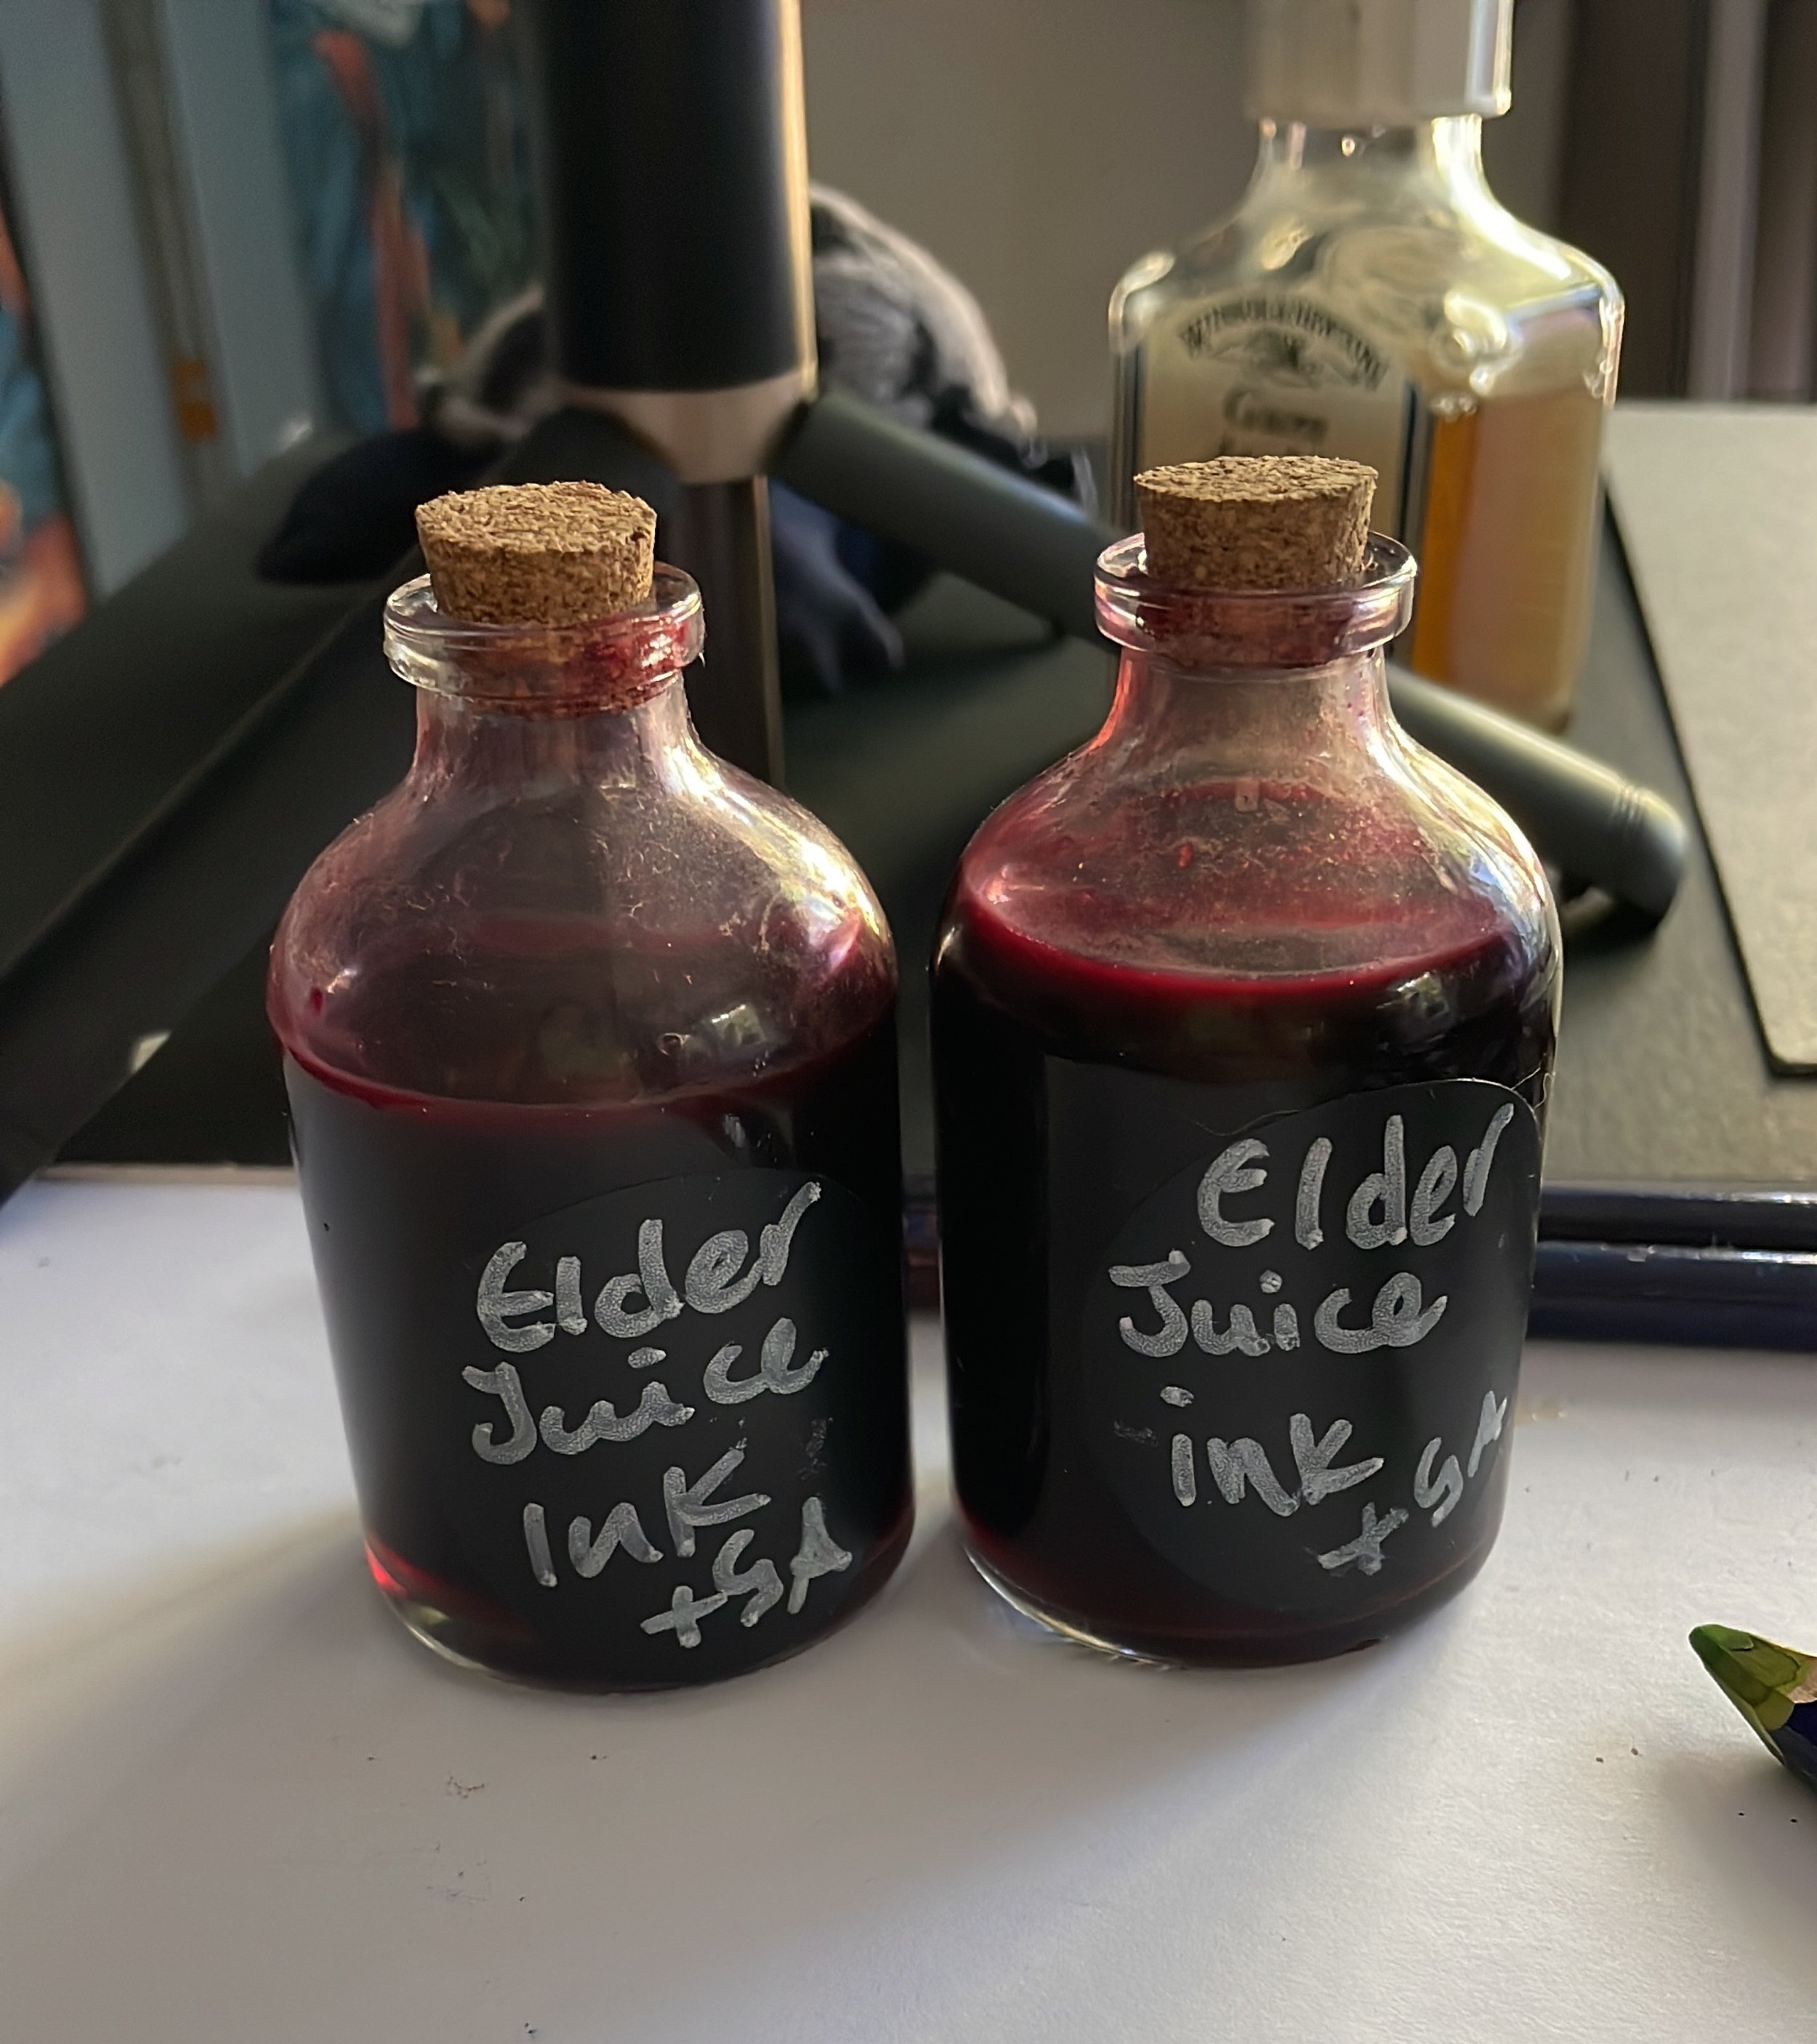
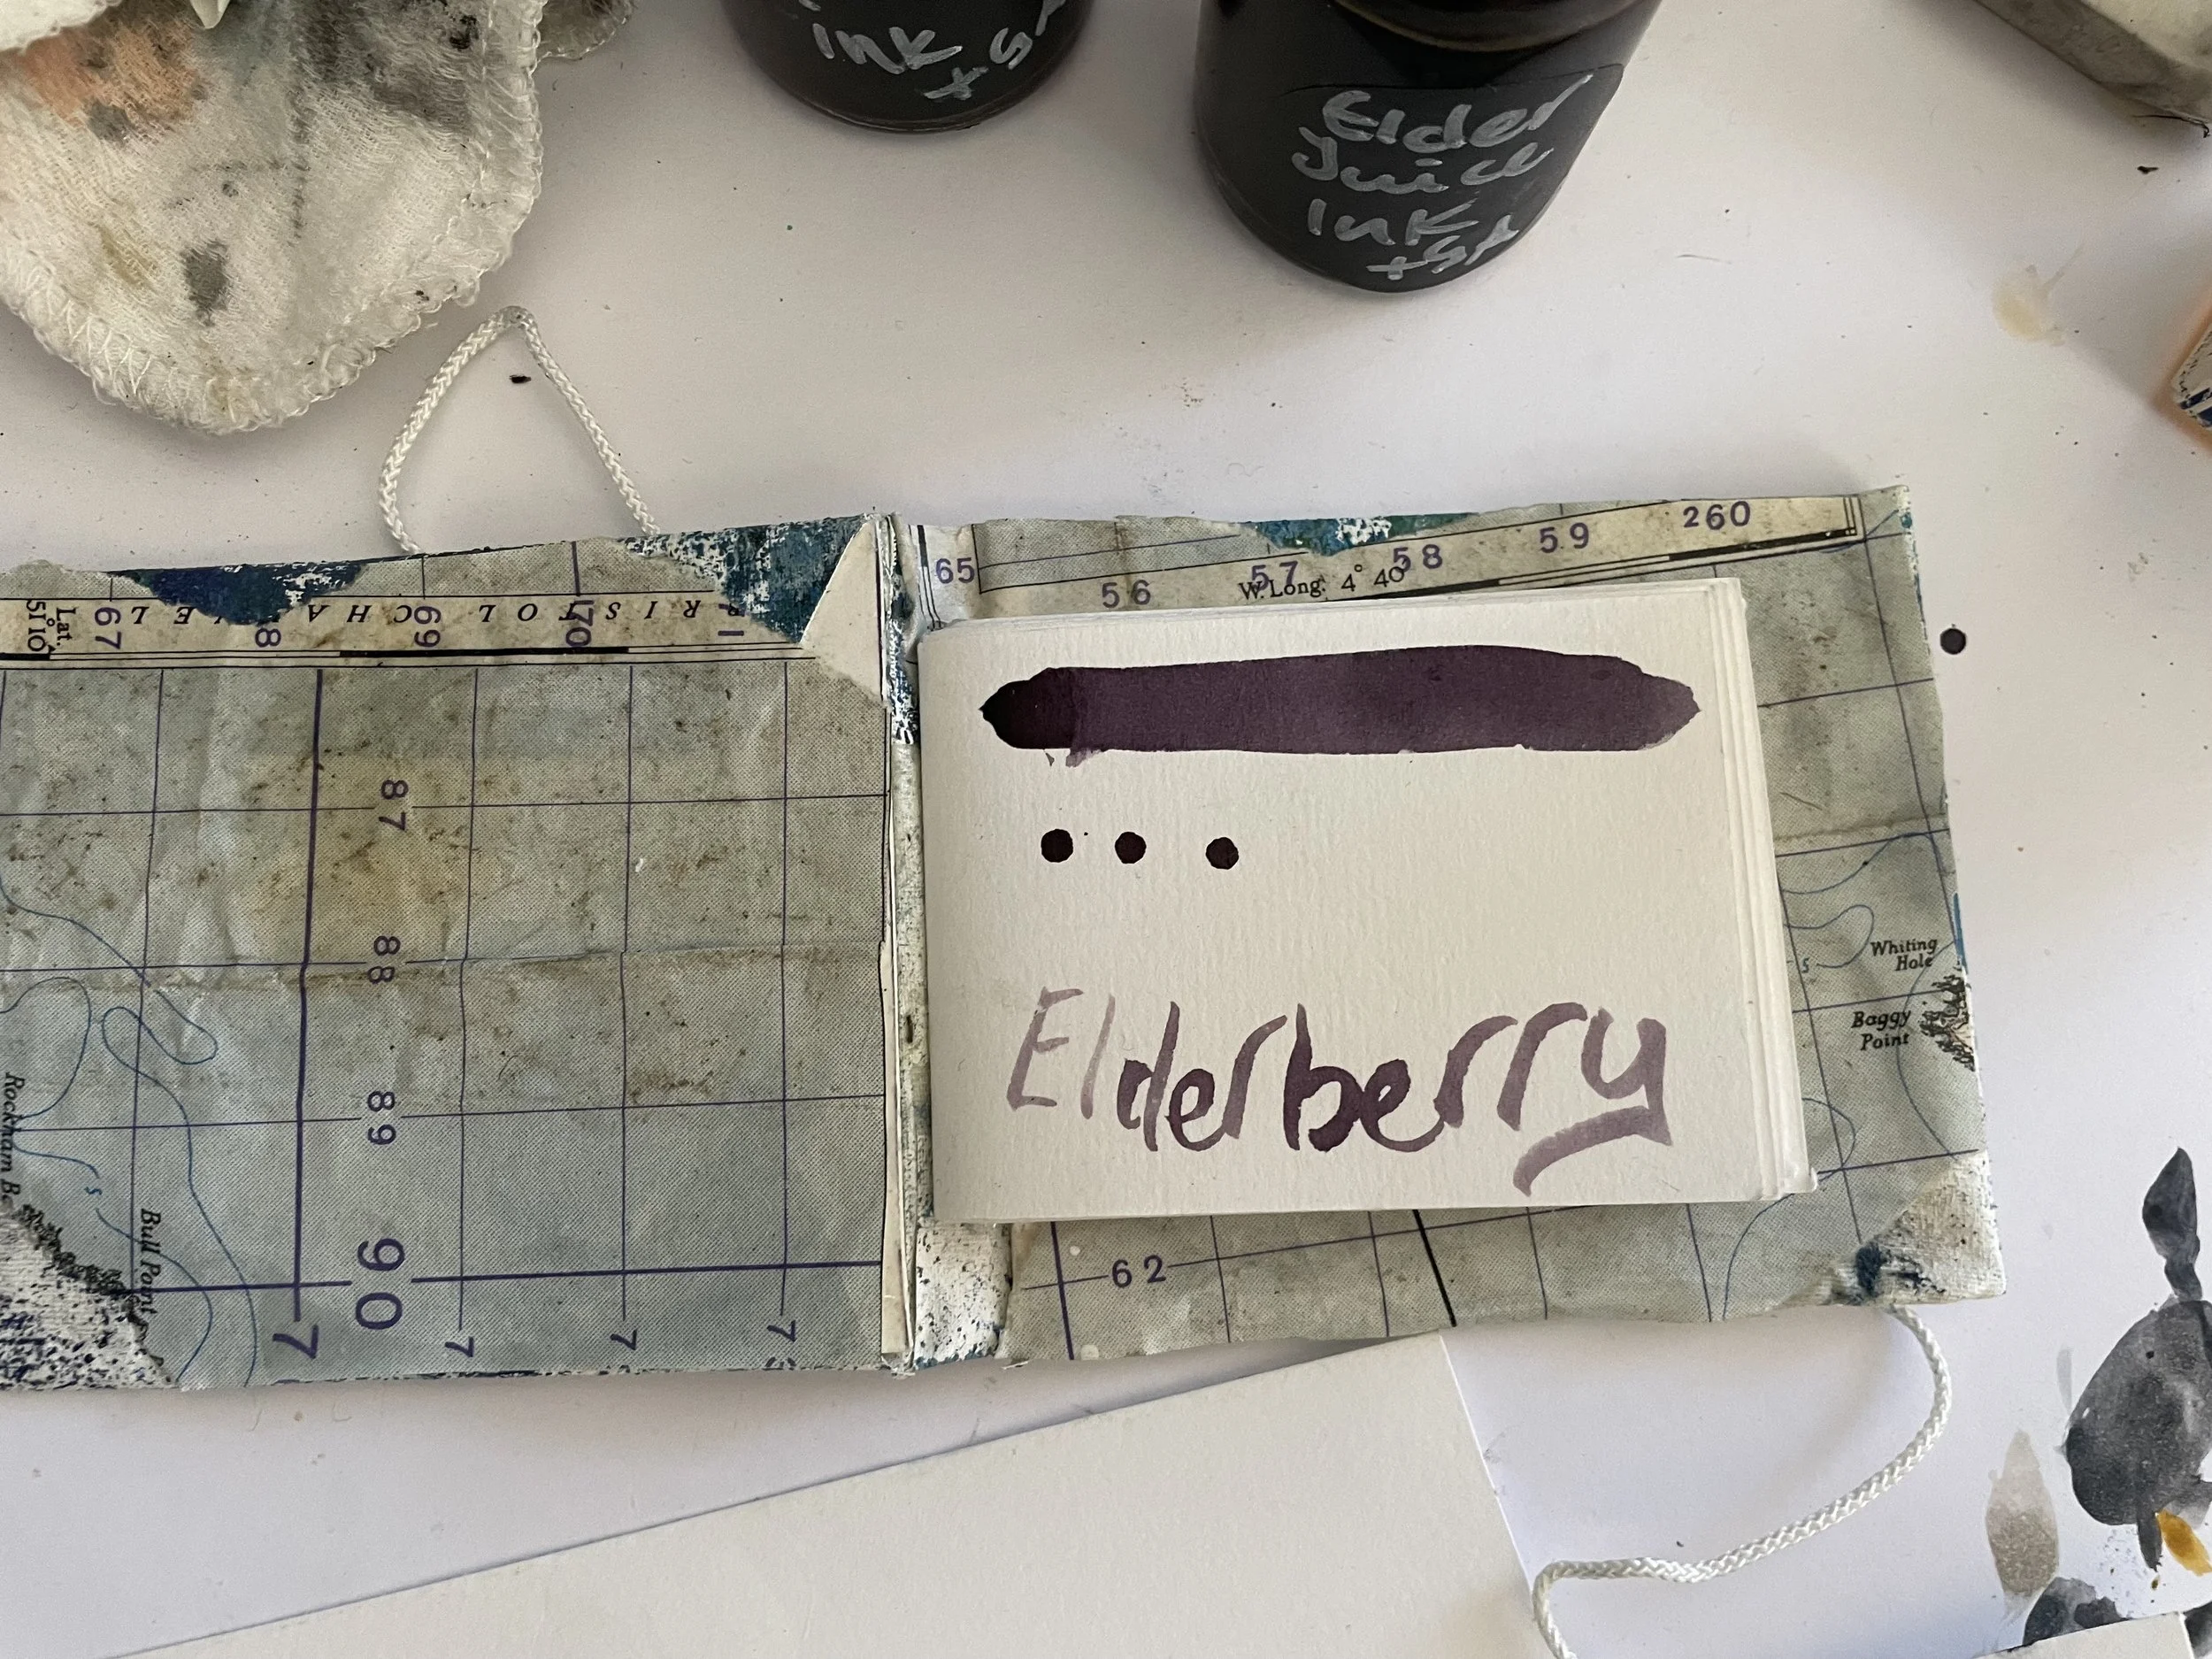
Once cooled I added to each 100ml of juice 1 tsp salt and 1tsp vinegar this is to help preserve it. It can be used Like this or as i did , added to a resin or gum Arabic to thicken it up and create a flowing ink. From here it is ready to use or push further to create other paint types.
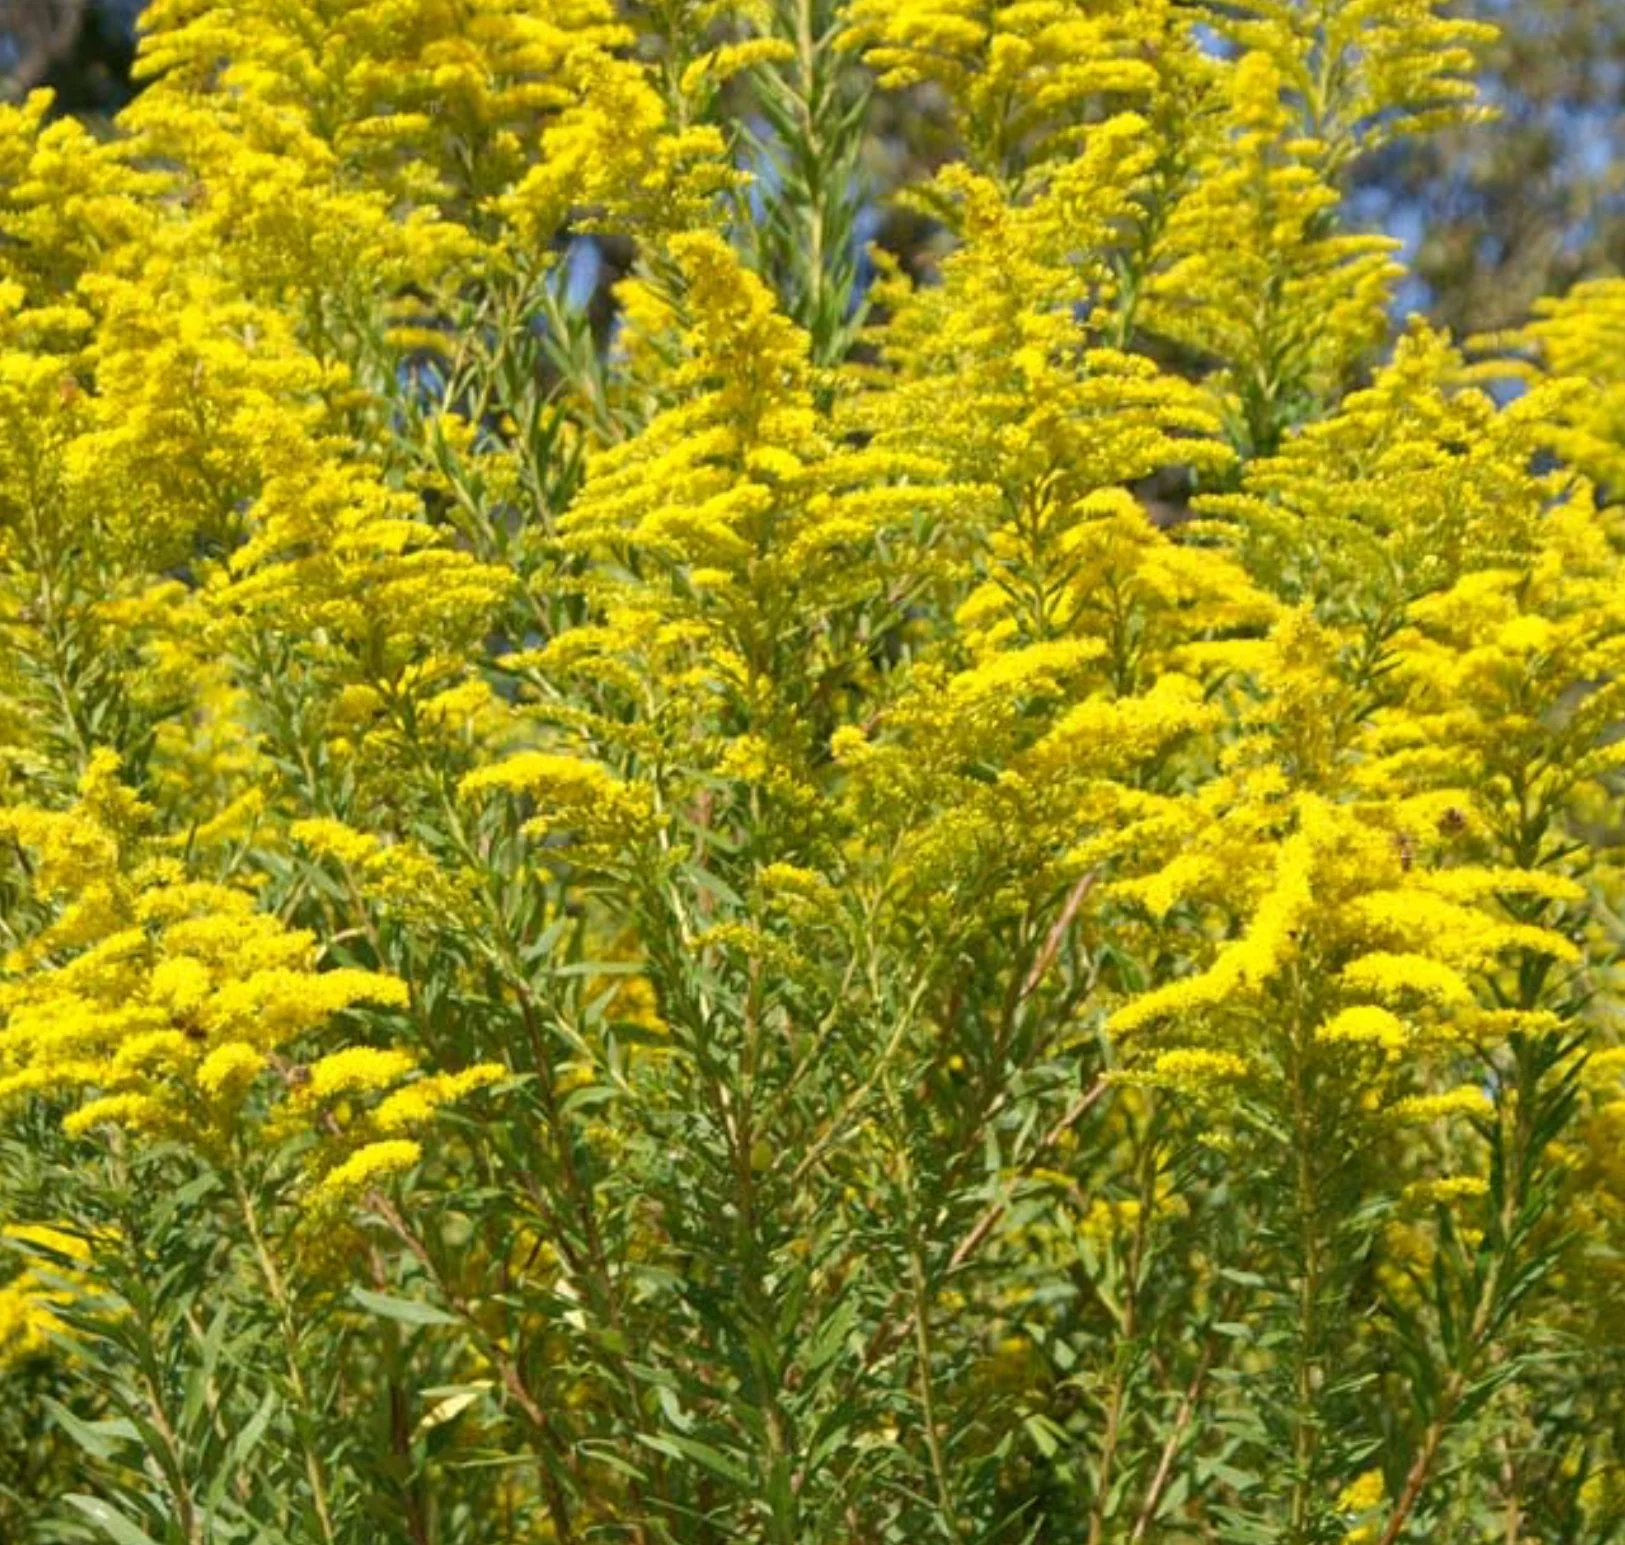
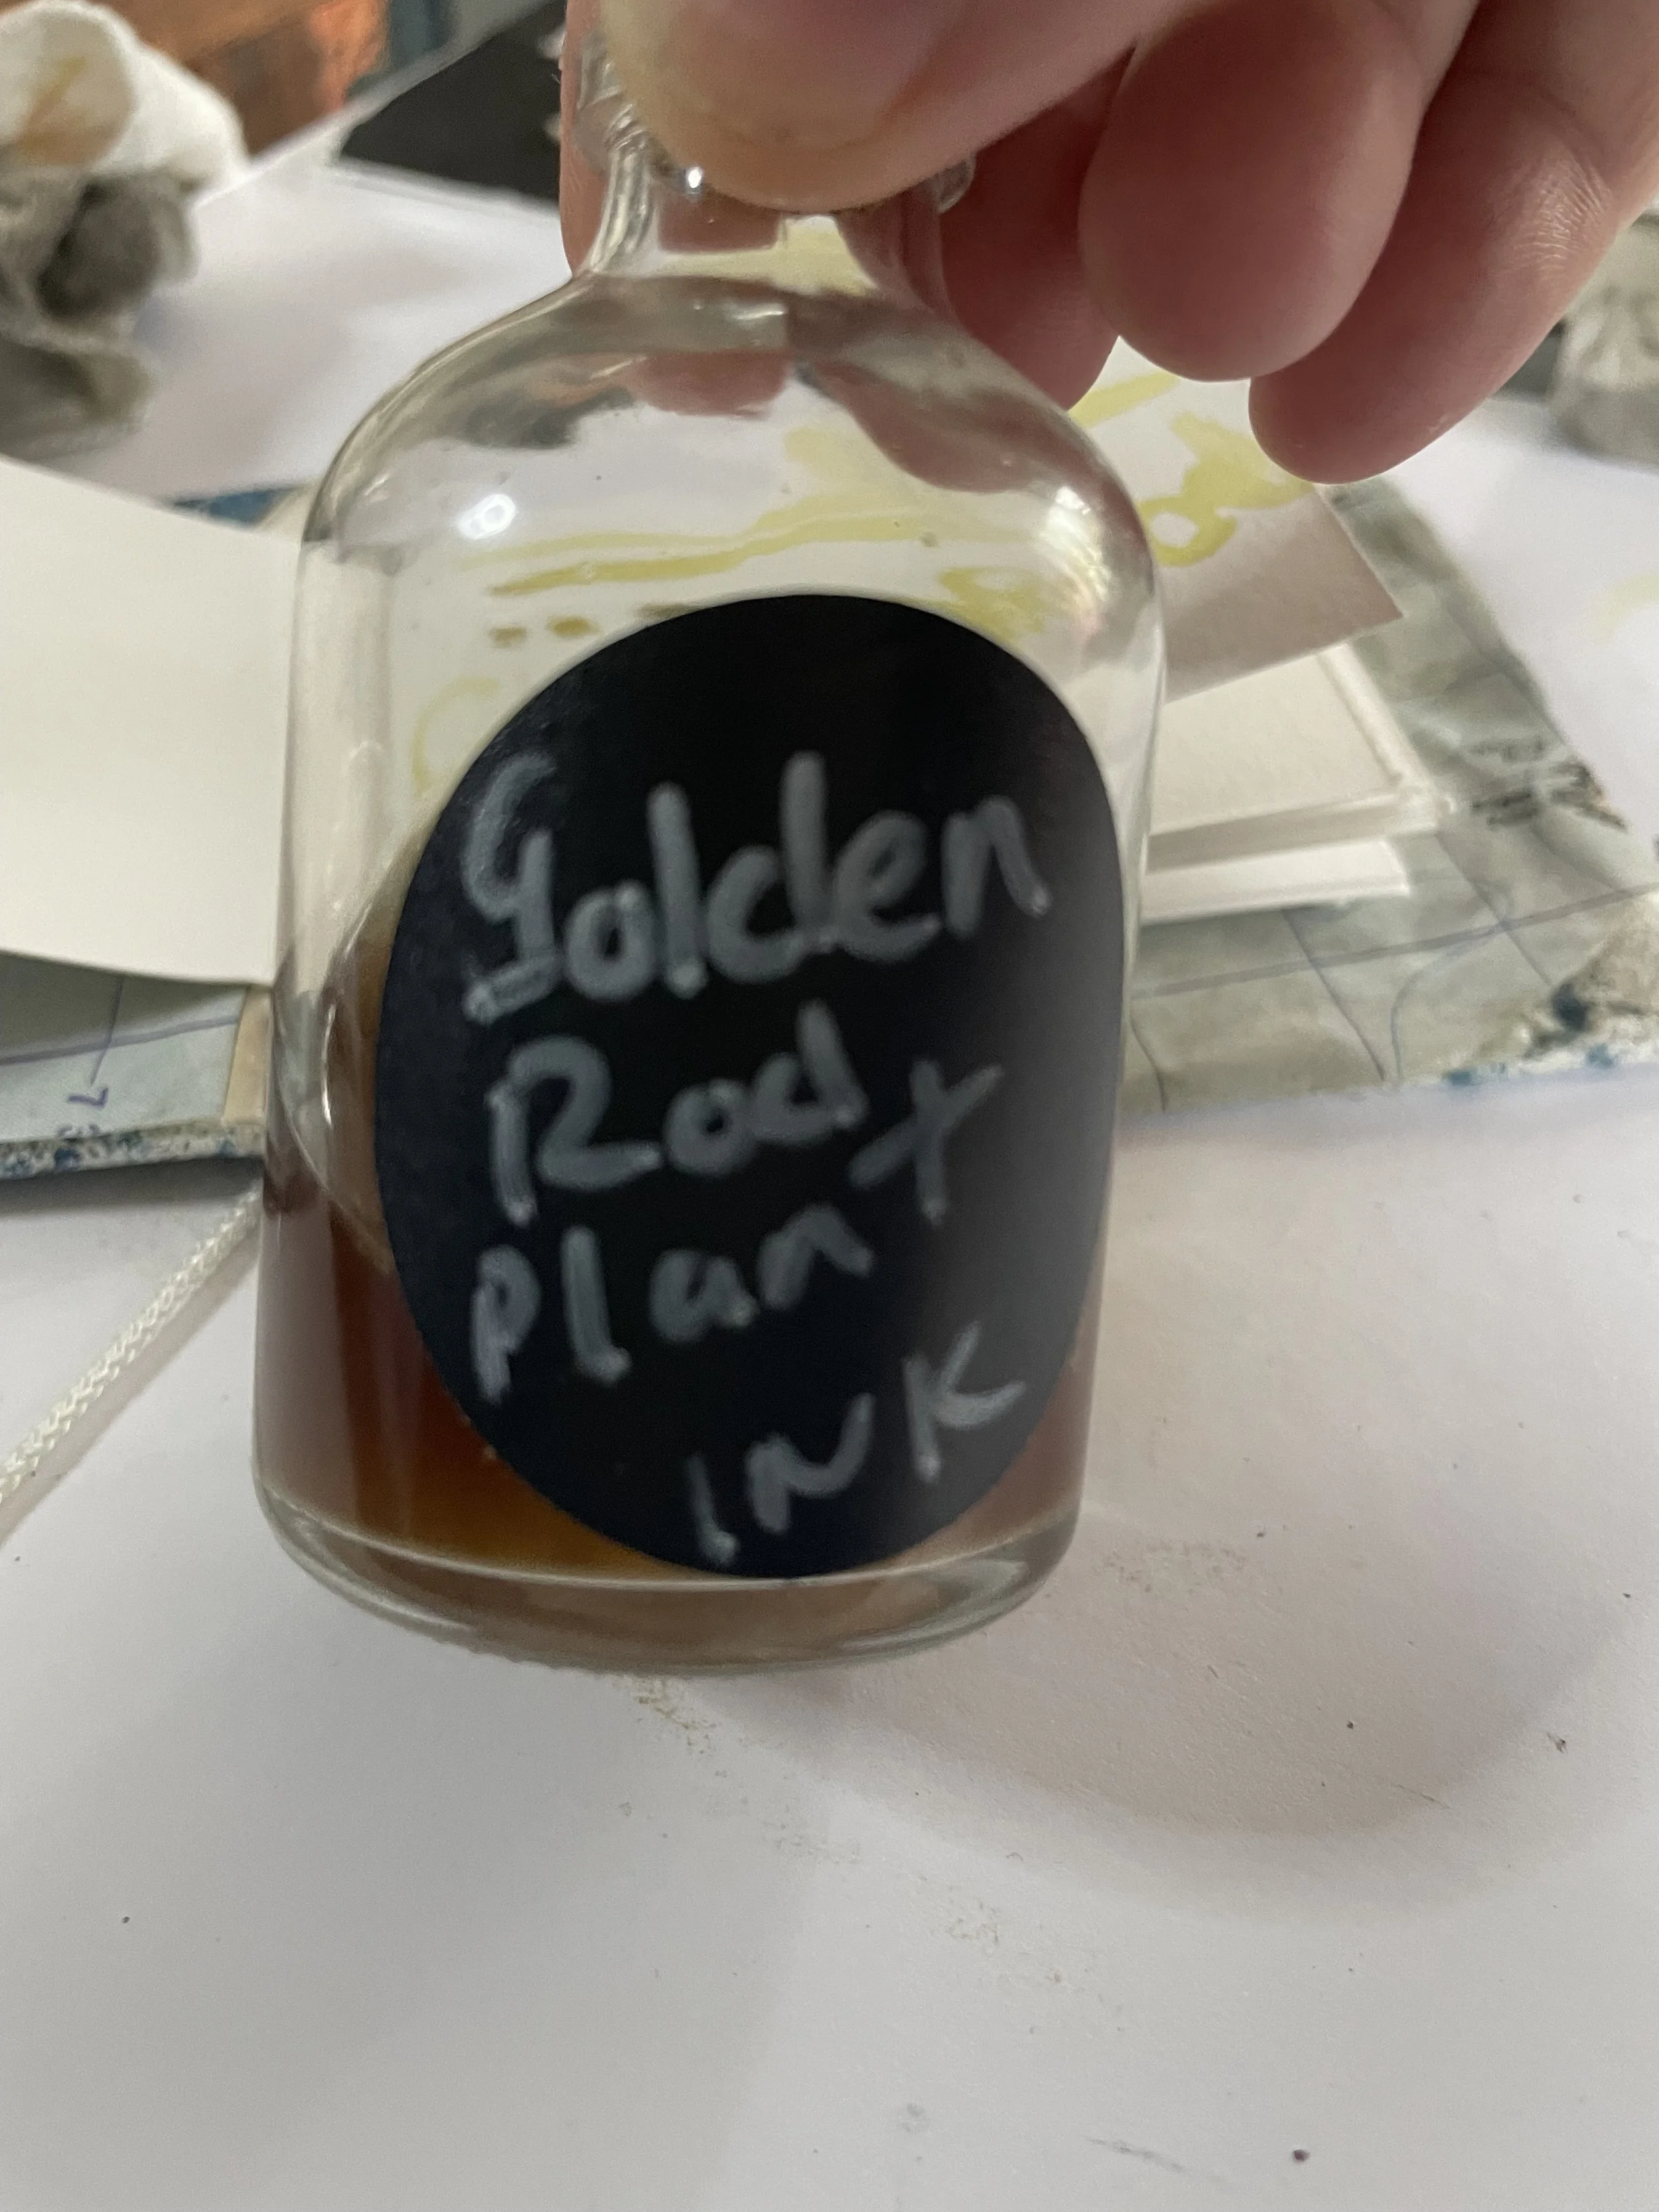

Golden Rod Ink
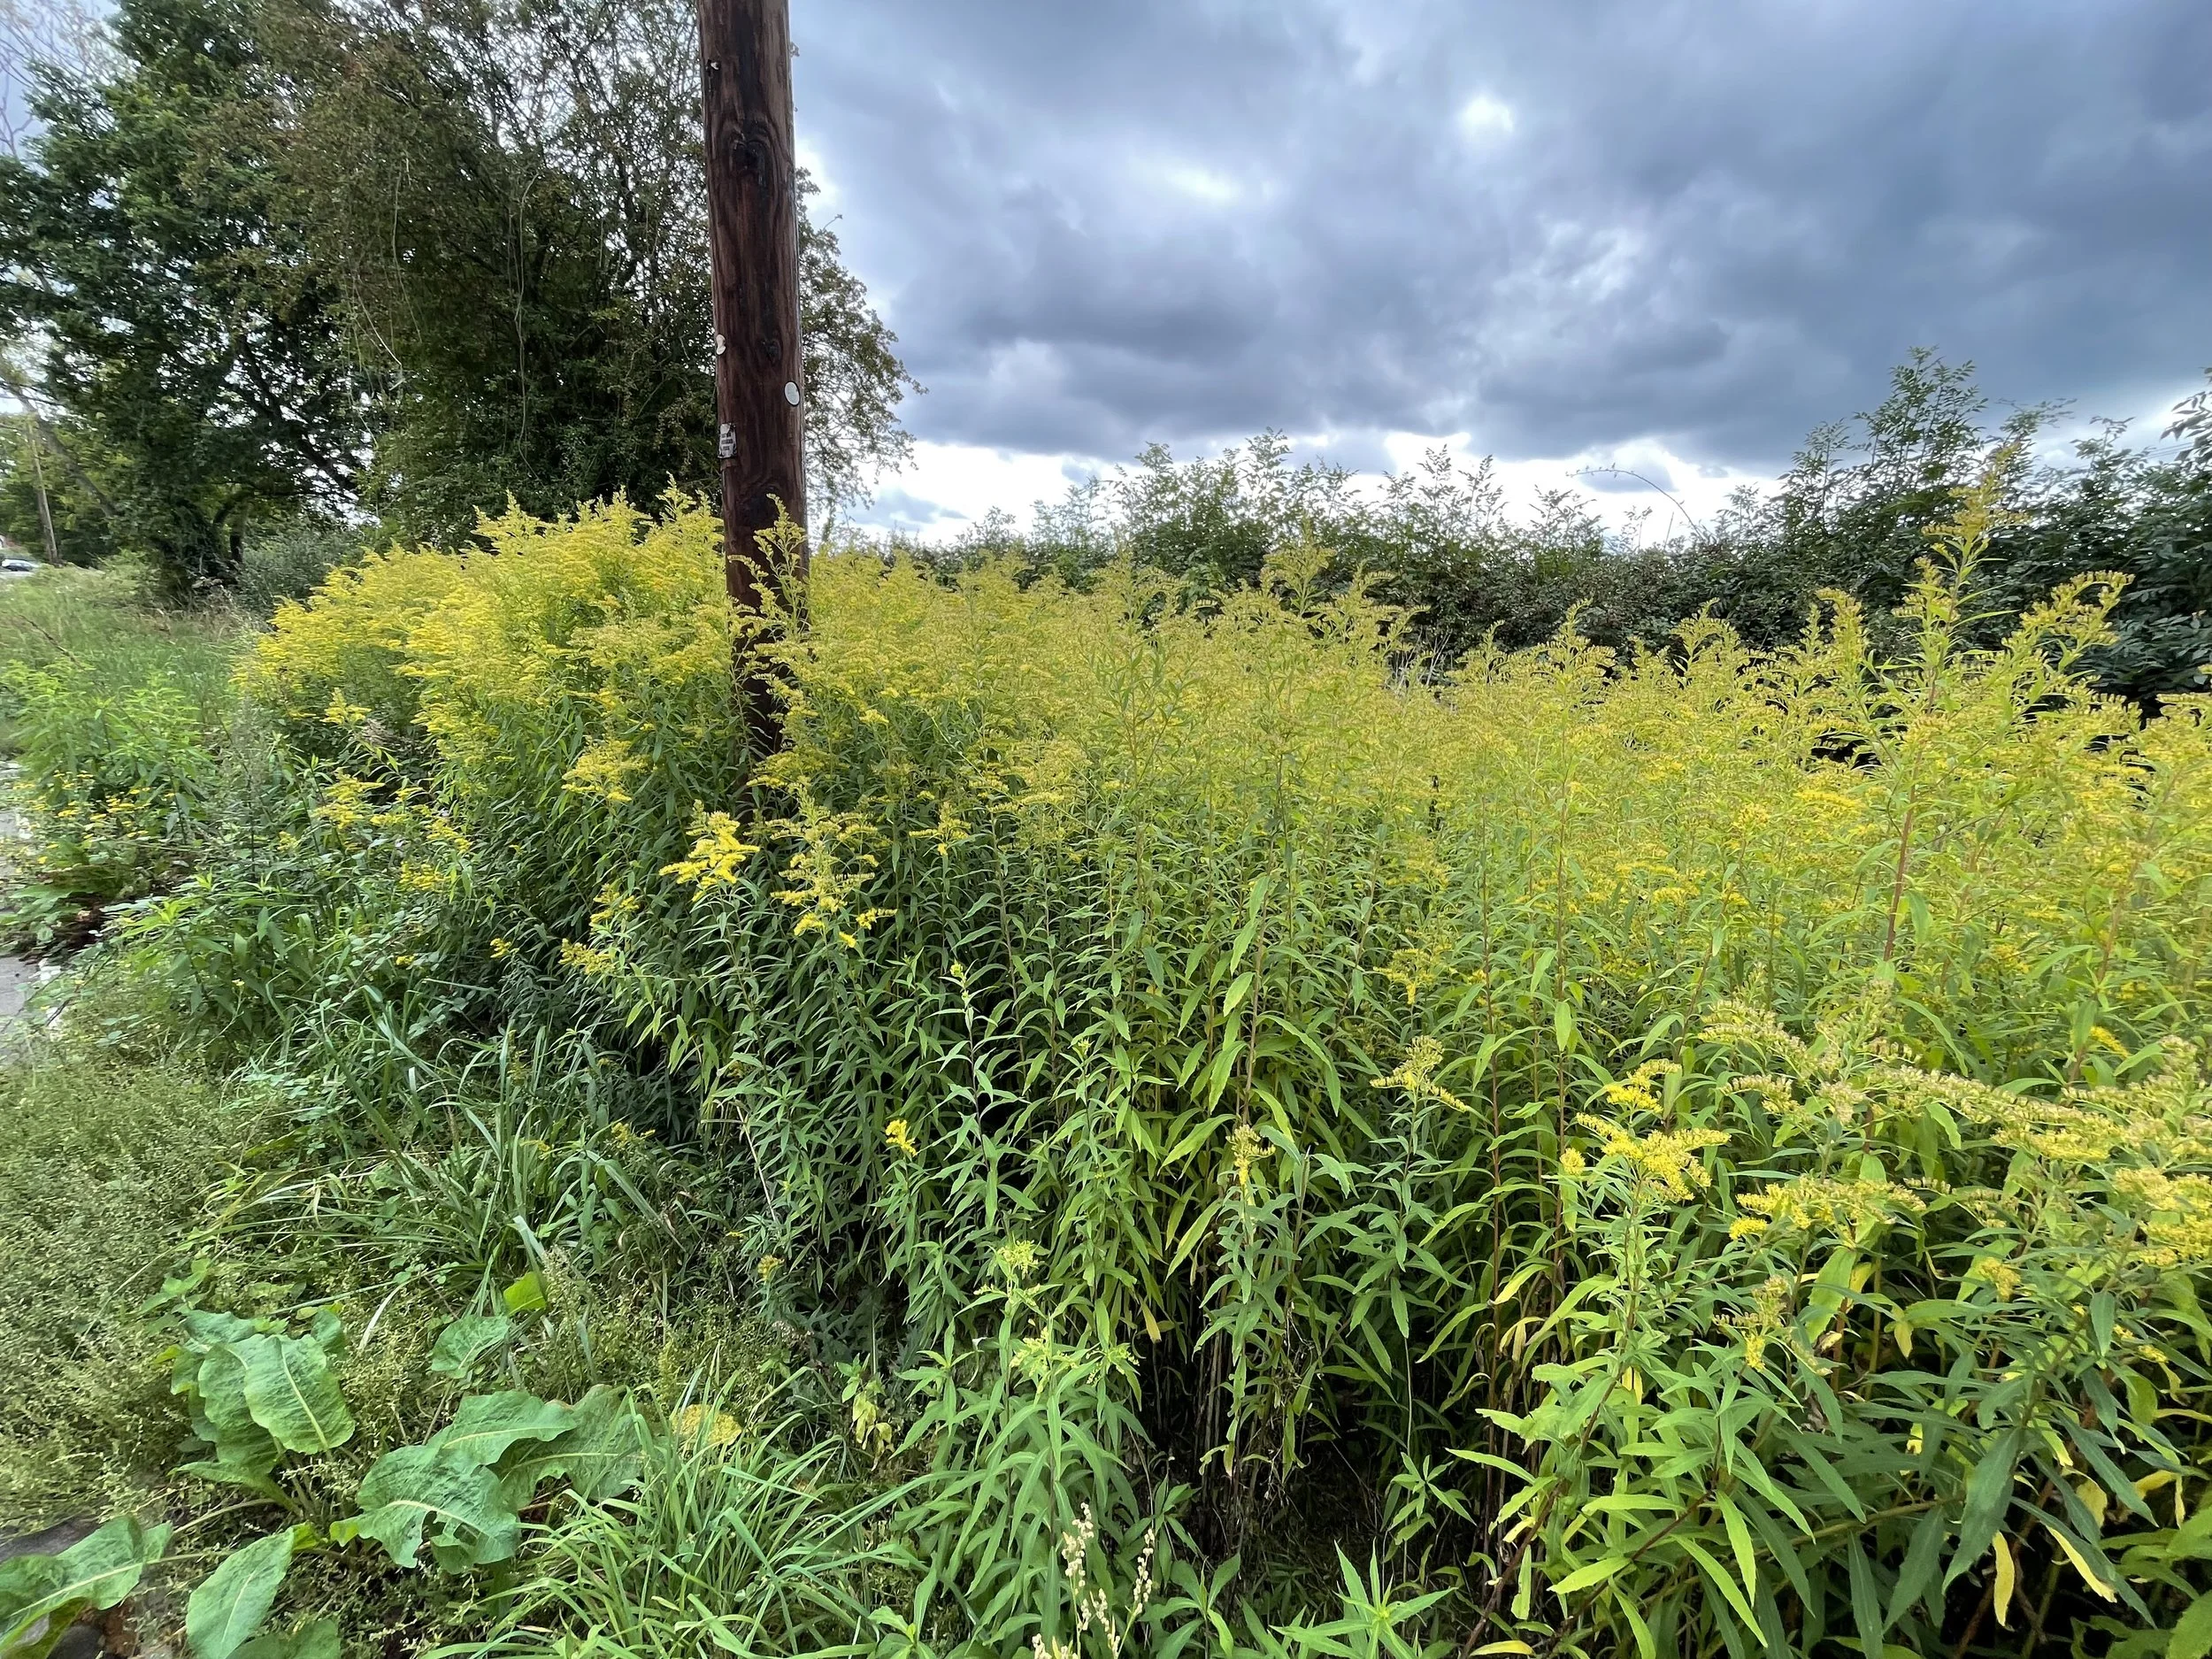
This is golden rod, and. A wild plant I had not seen before but it did hear about. I happened to drive past a small verge of tall bright yellow colourful plant as it was coming to the end of it flowering, and wondered if this was indeed golden rod. As any good forage know if you don’t know the plant take lots of photos and a small sample to try out.
This is what I did and found out I was right. It’s always a good feeling when your first instincts are write it really feels like your learning something and its is sticking with you.
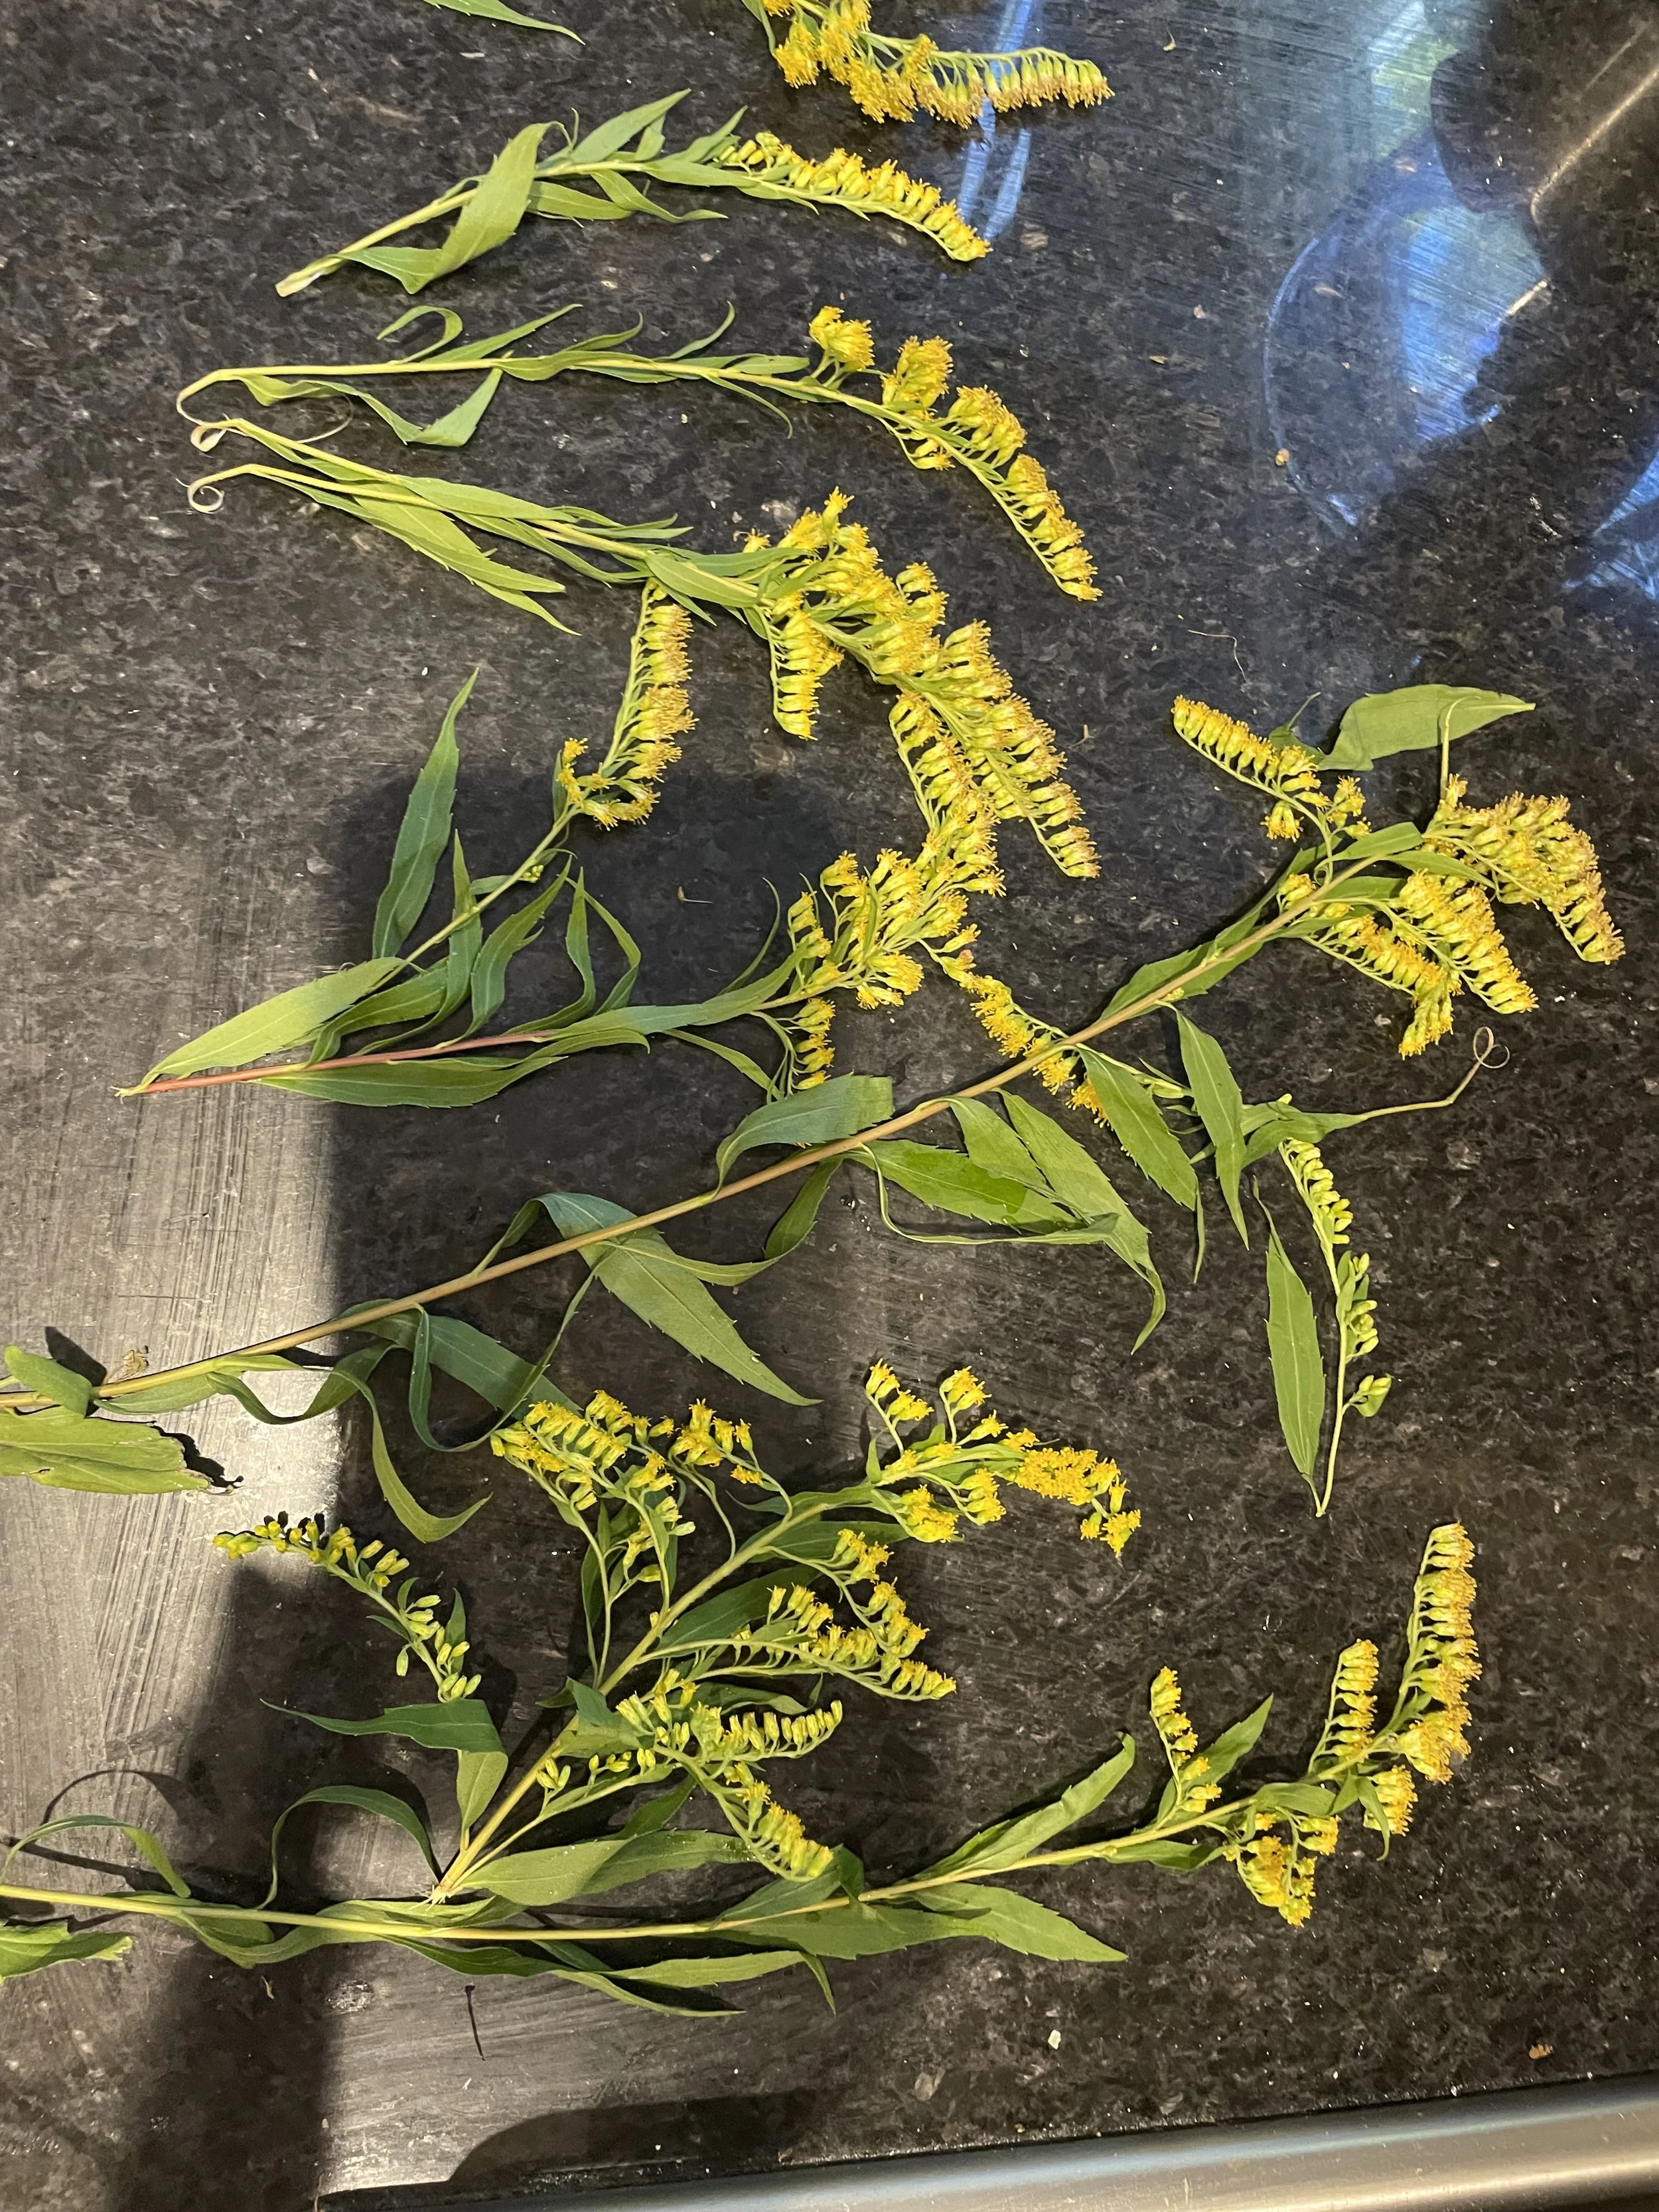
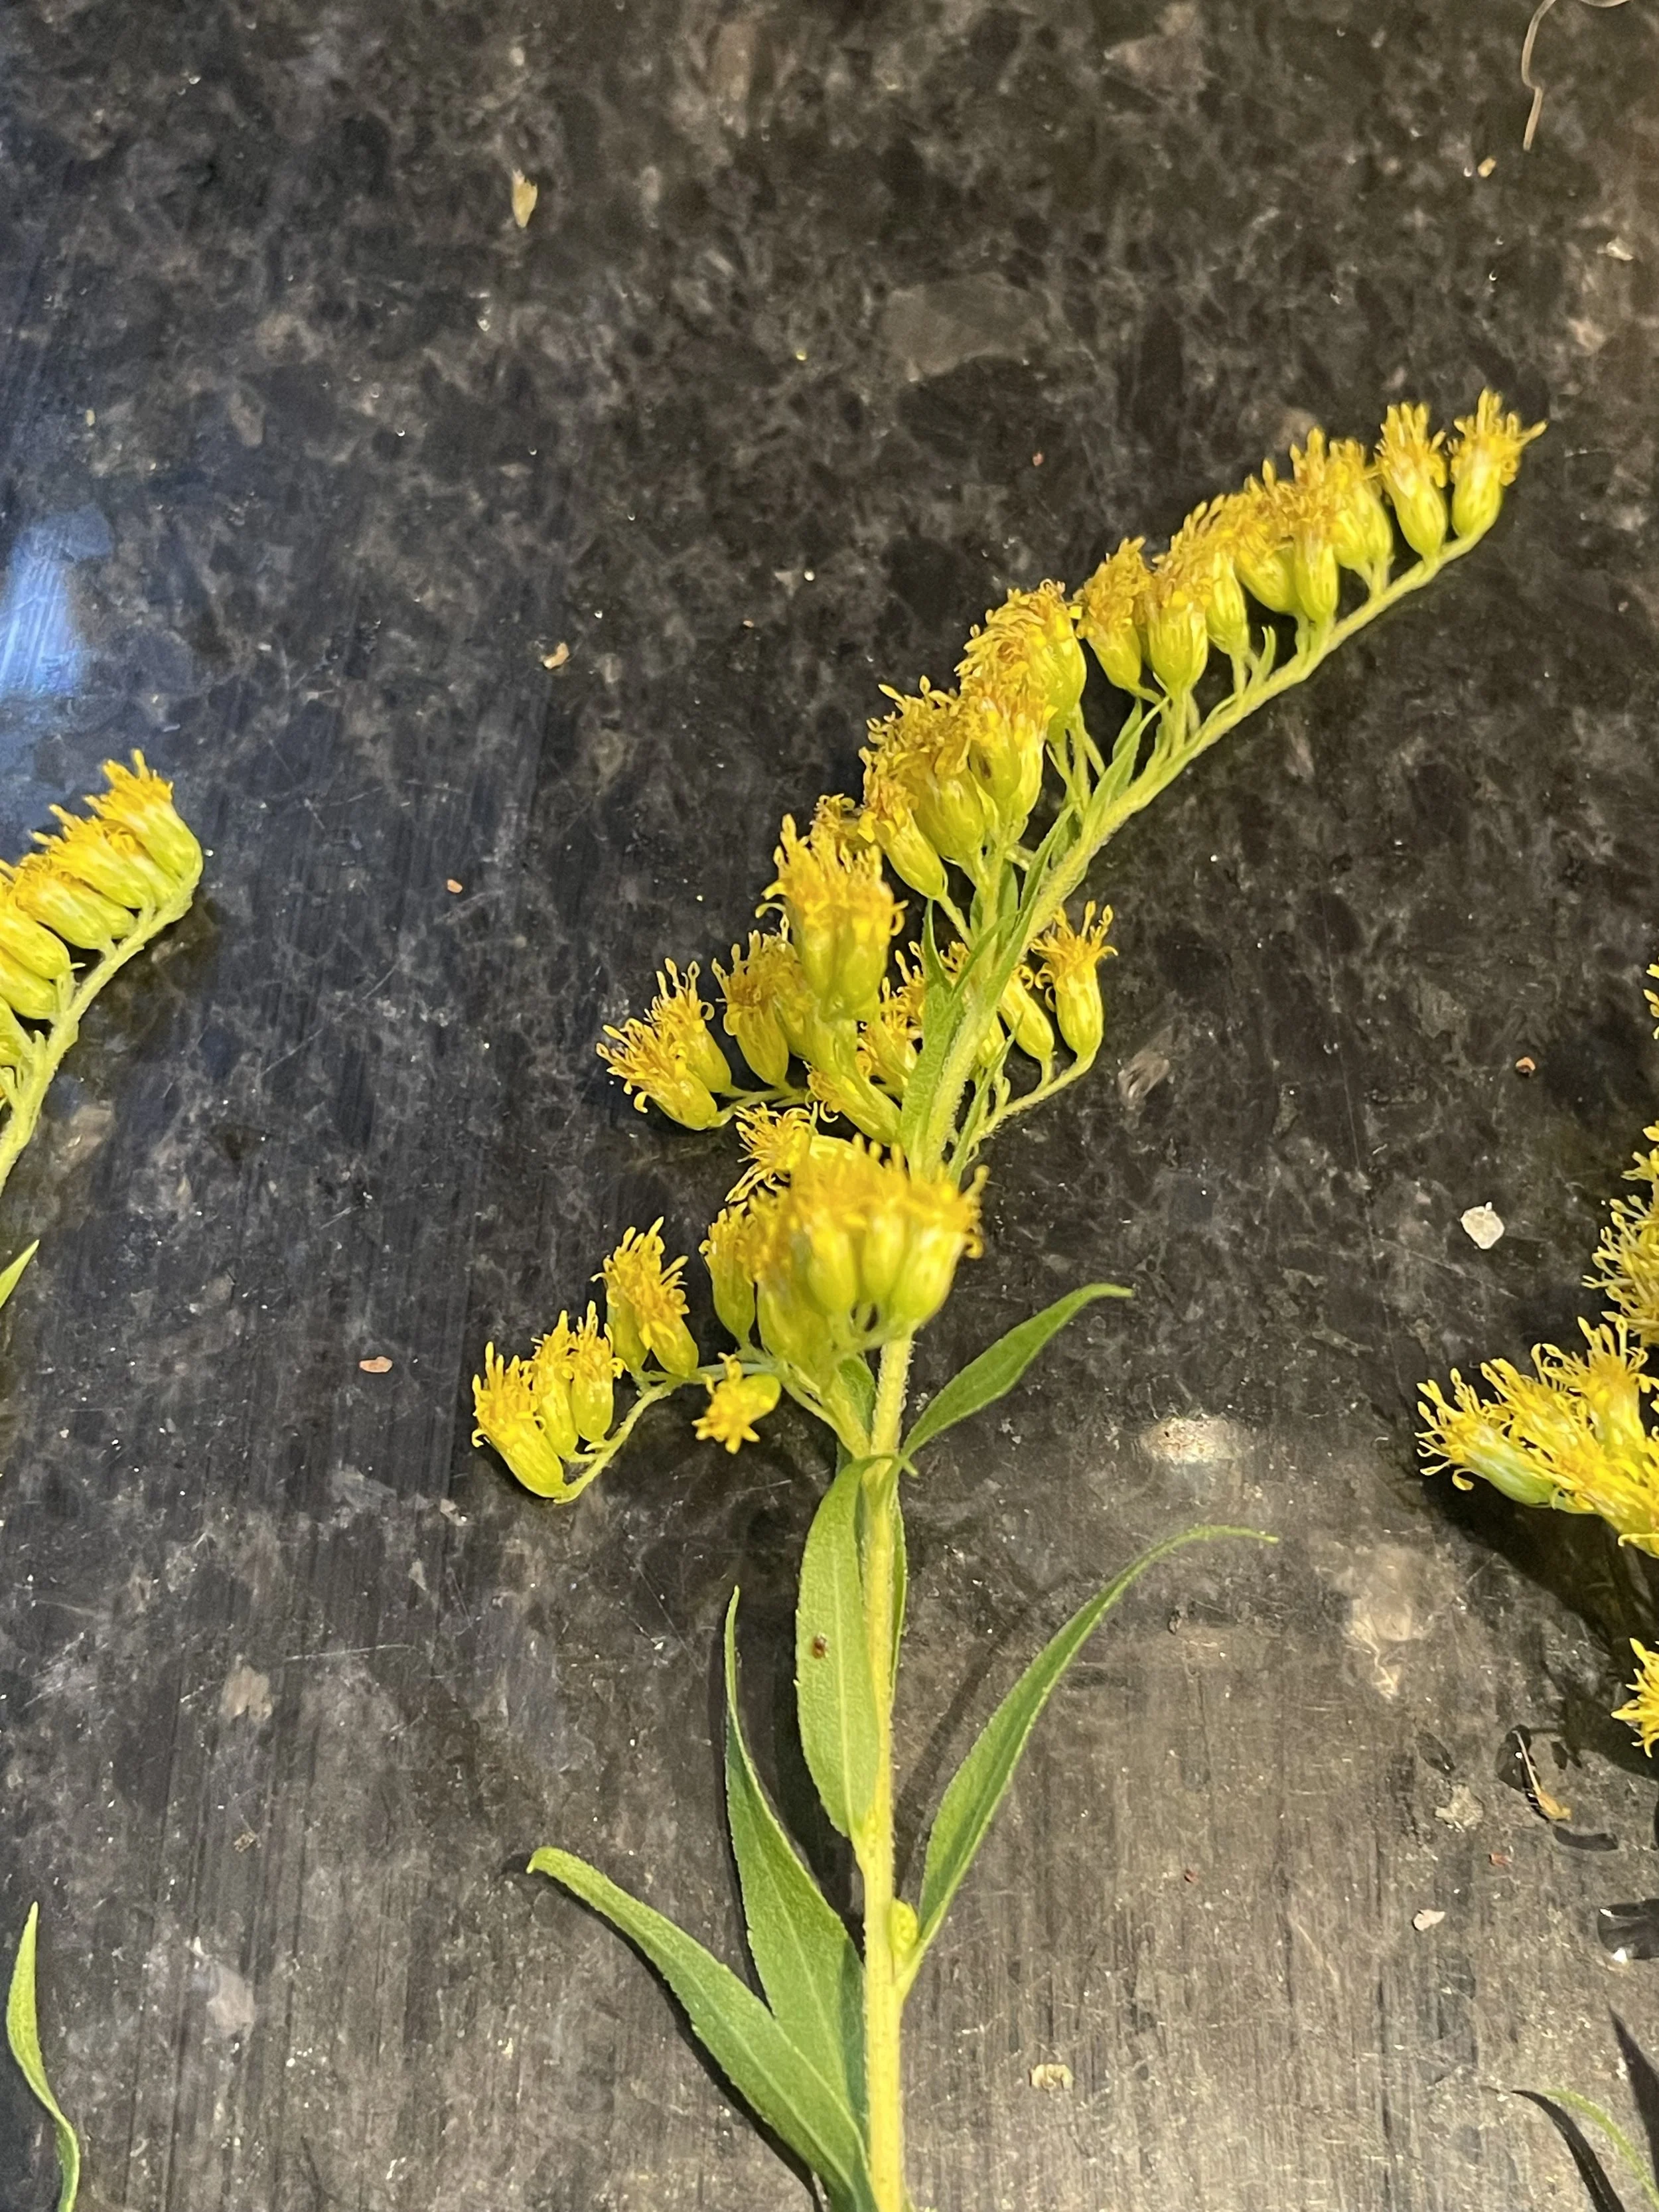
I decided because I didn’t take a lot of this that I may be able to make some ink from it, as it was so very yellow, and I didn’t want to waste it.
It did seem like quite a delicate plant and started to wither quite quickly so this time I didn’t heat it, i just soaked the whole plant chopped up in warm water for 48 hours. I was going blind into this experiment and had no idea if it would work.
But it did and after 48 hours i had a yellow liquid that was very runny, next i did heat it slowly to reduce it down a bit. When it was cool I did the same thing to this as i did to the elderberry with salt, vinegar and gum Arabic.

The Alchemy of Ink: Foraging Oak Galls for Natural Writing and Drawing
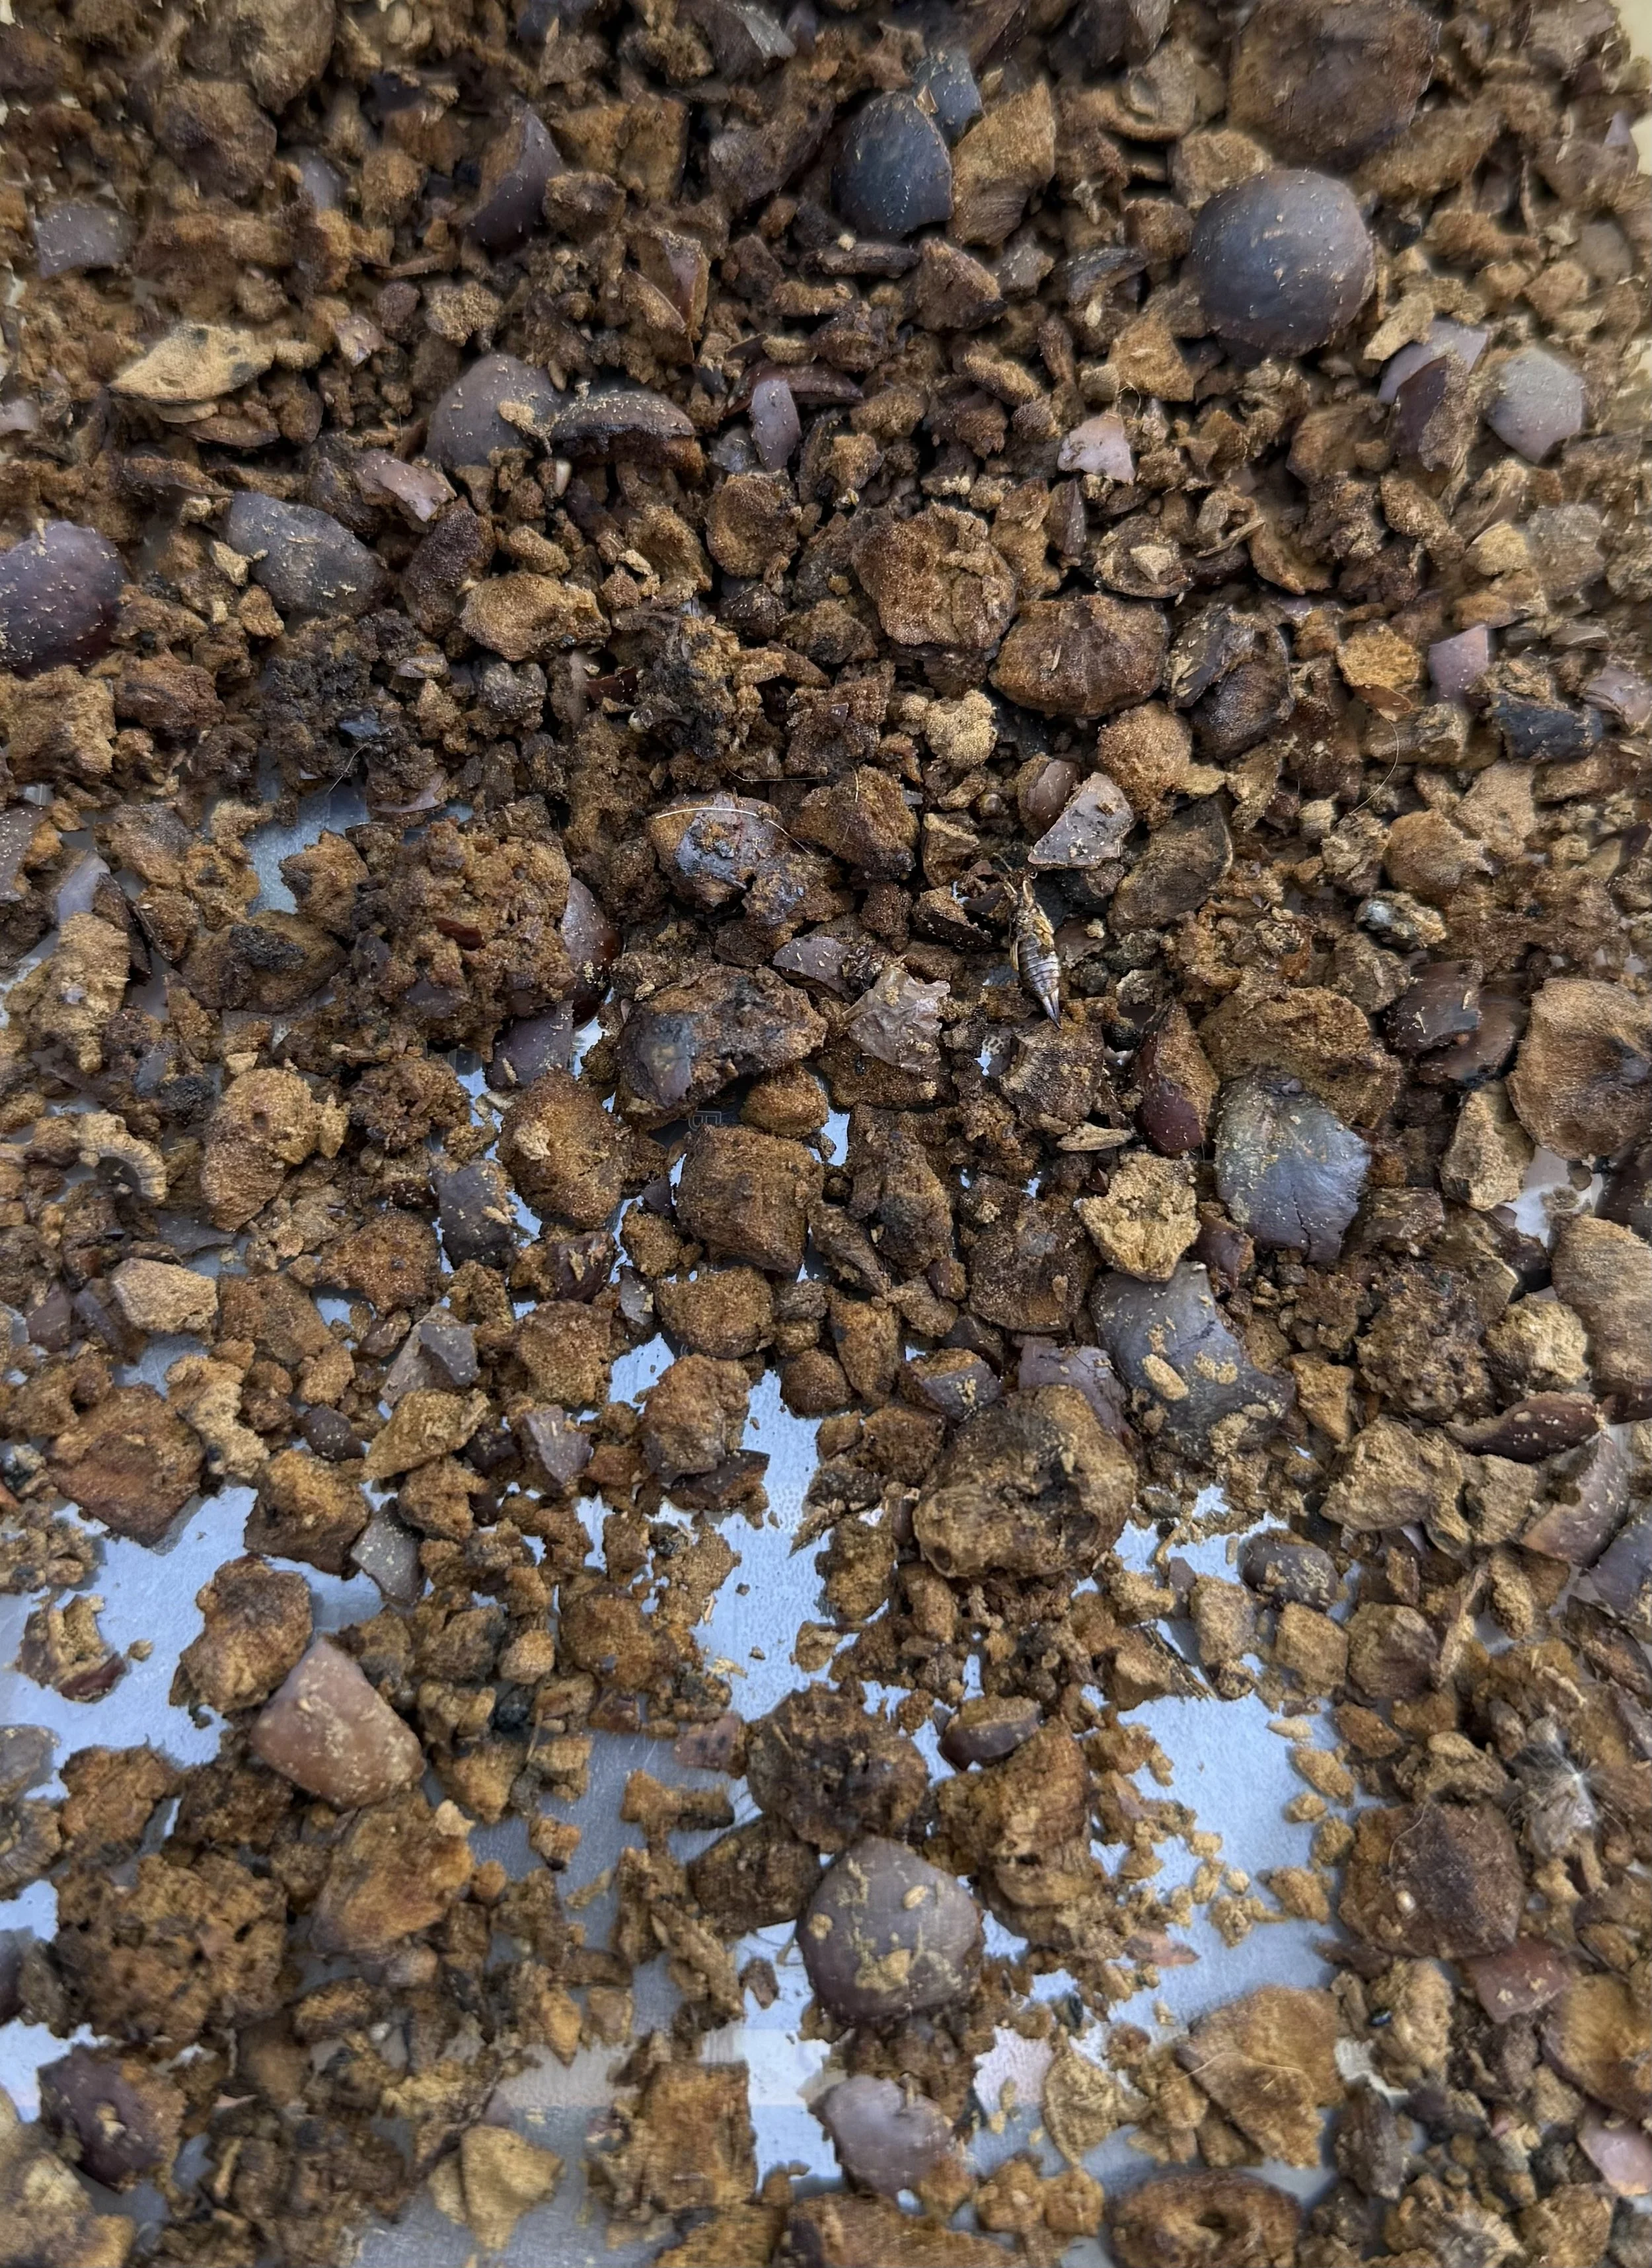
Among the twisted limbs of oak trees, a curious growth sometimes appears, round, woody, and almost otherworldly. These are oak galls, formed when tiny wasps lay their eggs in the tree’s tissues, prompting the oak to build a protective casing around the larvae. Though born of a strange interaction between insect and tree, a kind of symbiosis, these galls are rich in tannins, making them perfect for one of the most historically significant natural inks in history.
I forage fallen oak galls by hand, usually in late summer and autumn, gathering them from forest floors and hedgerows. These seemingly humble nodules become the heart of a centuries-old craft: the making of oak gall ink.
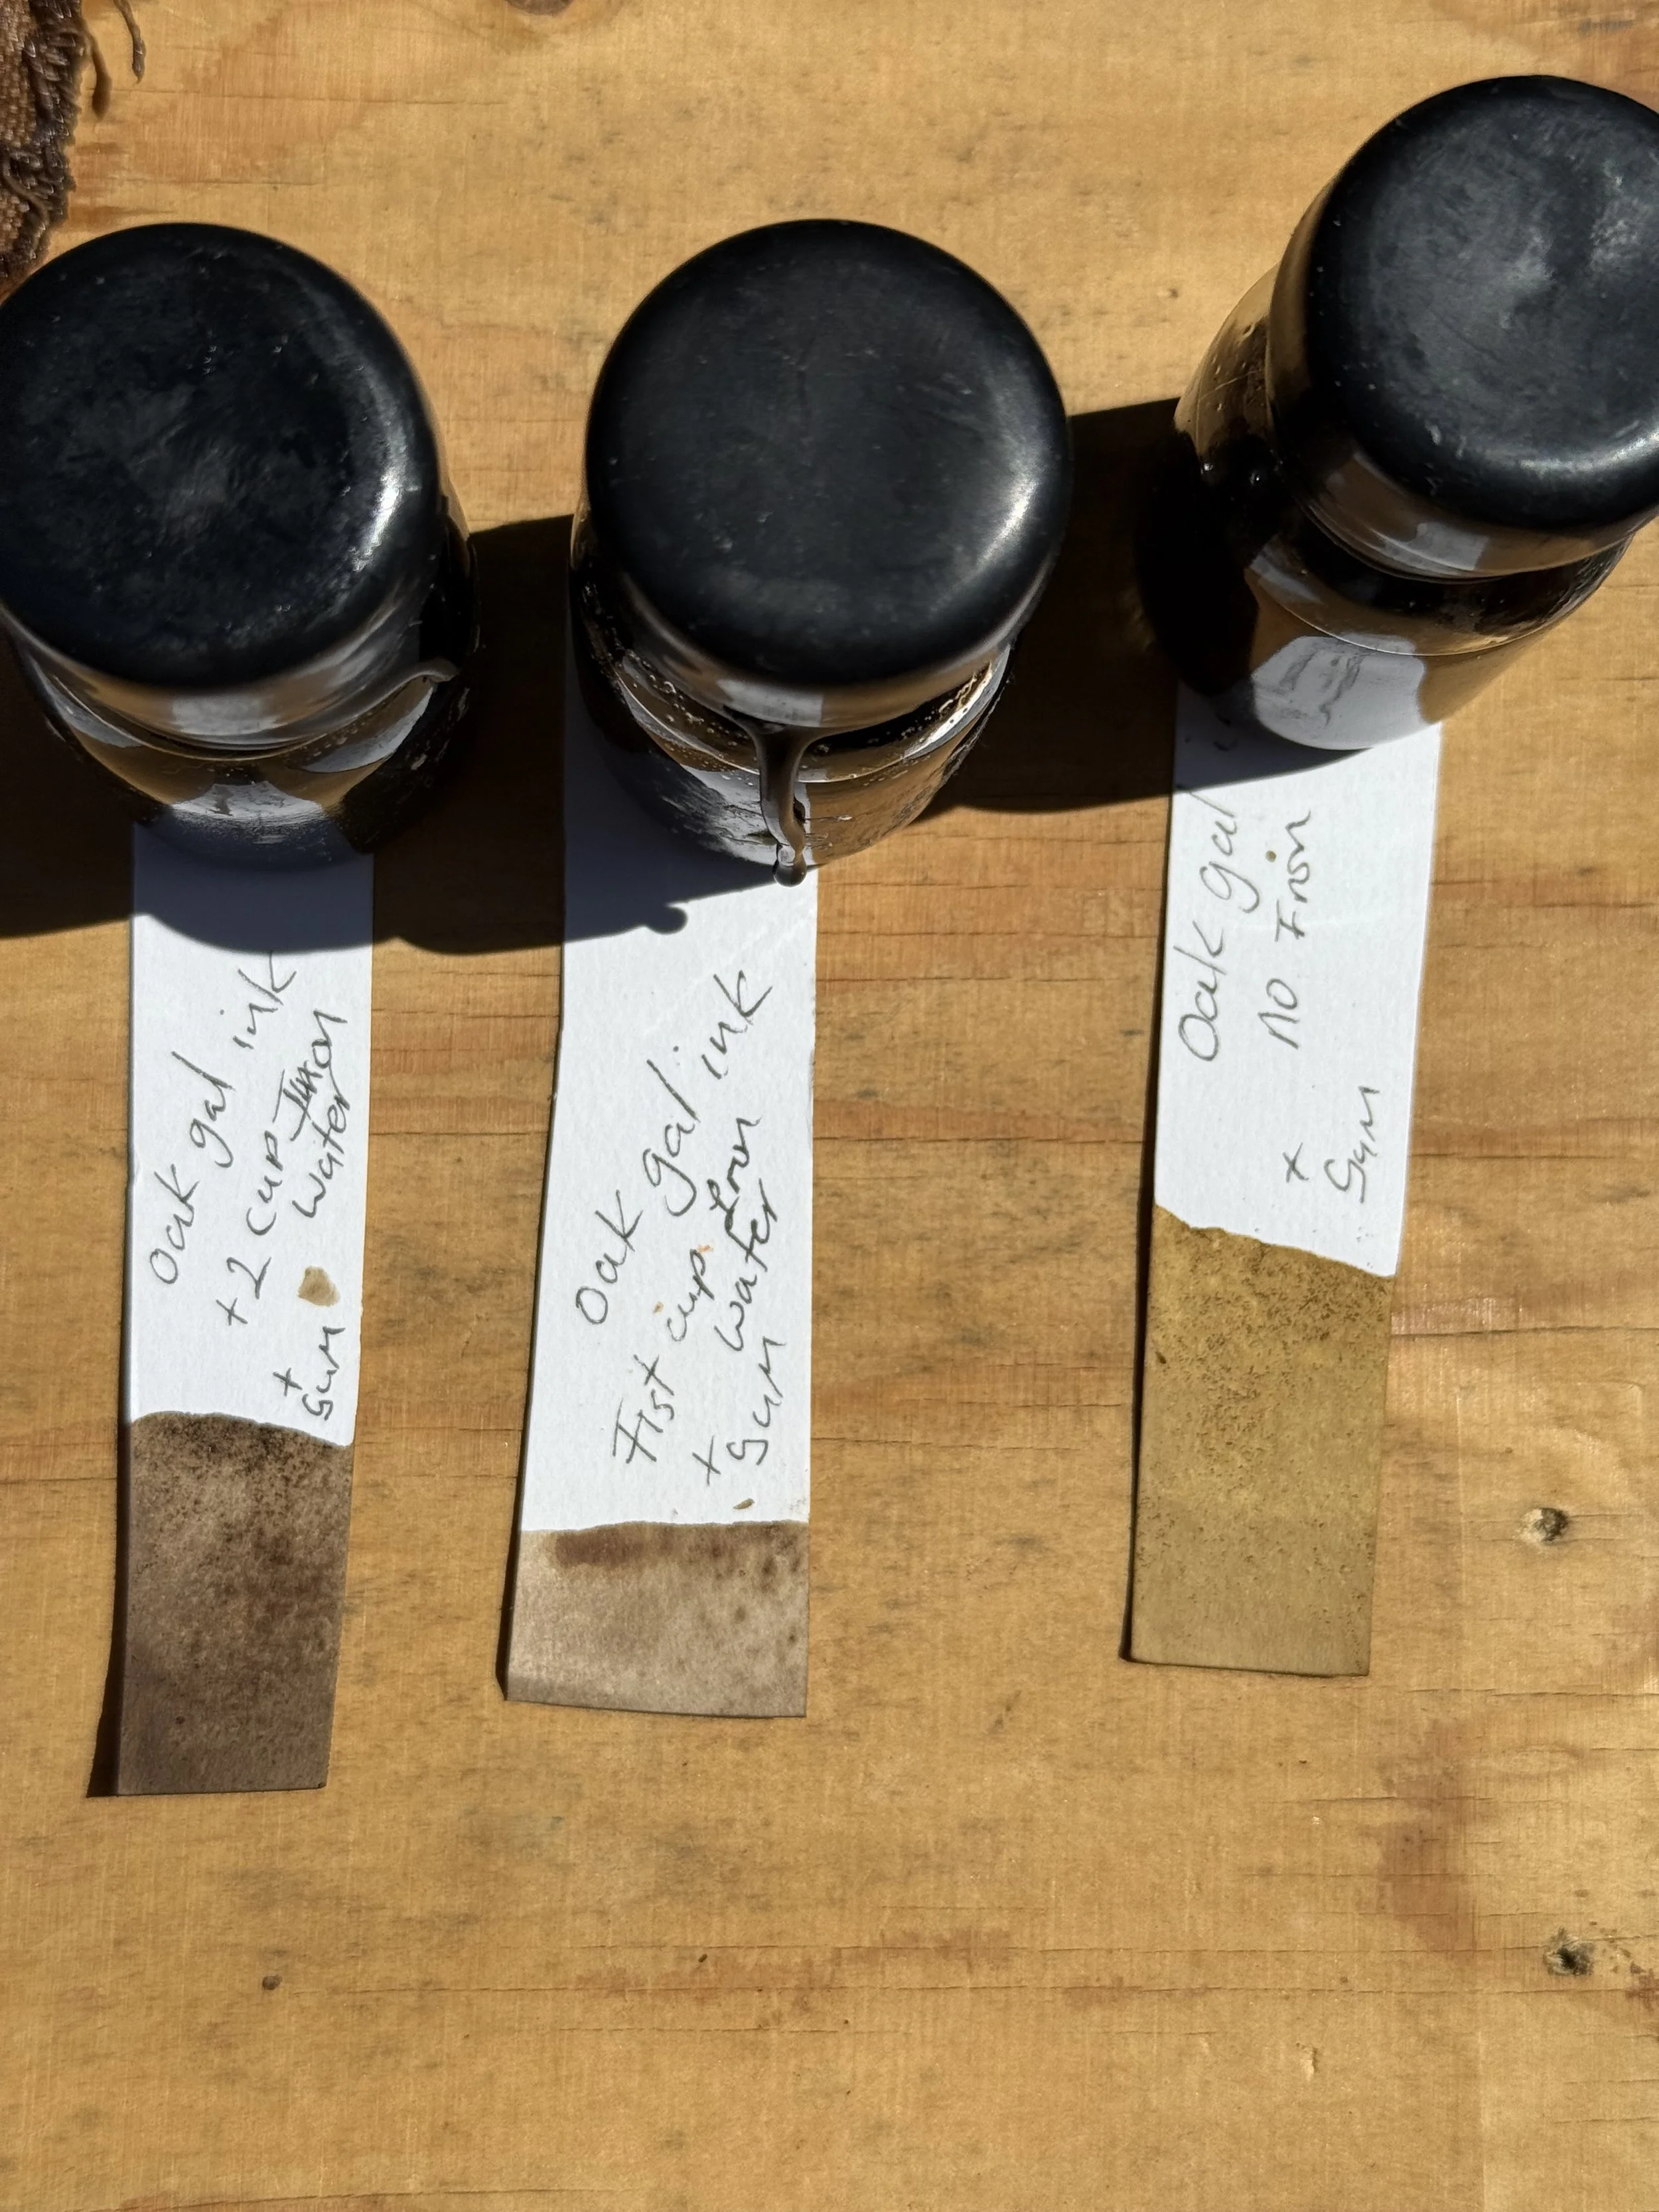
My Method
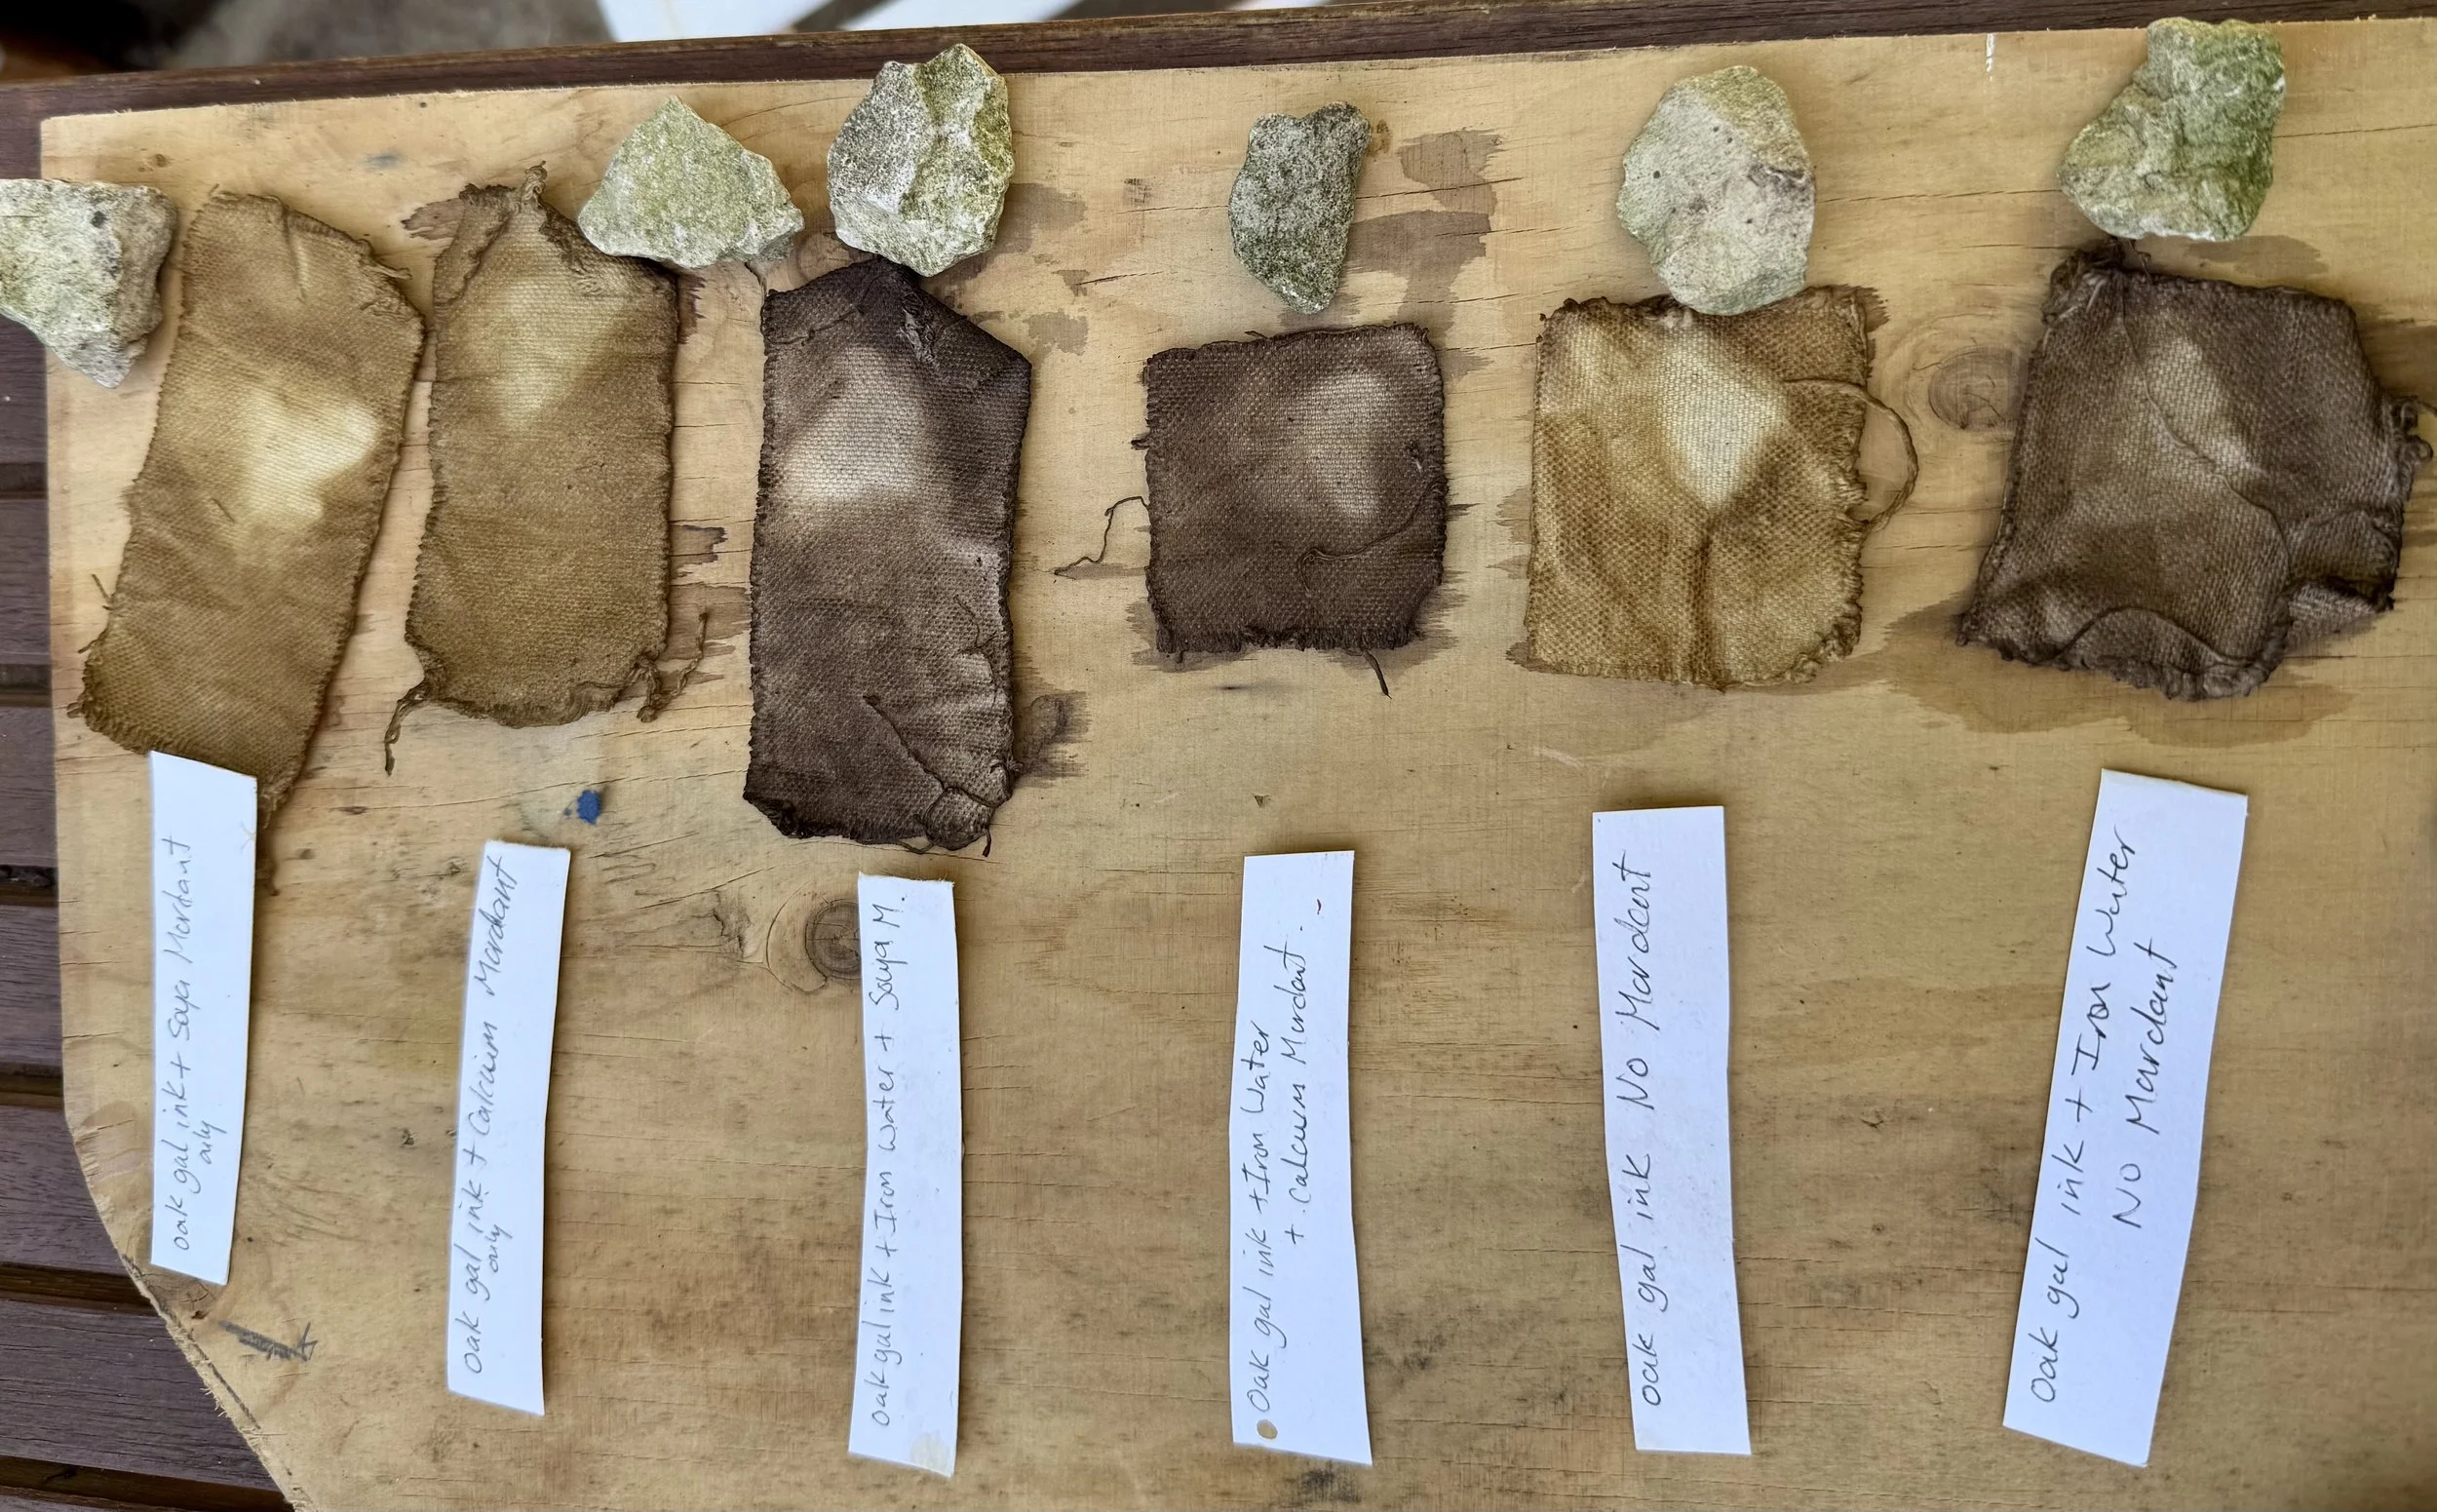
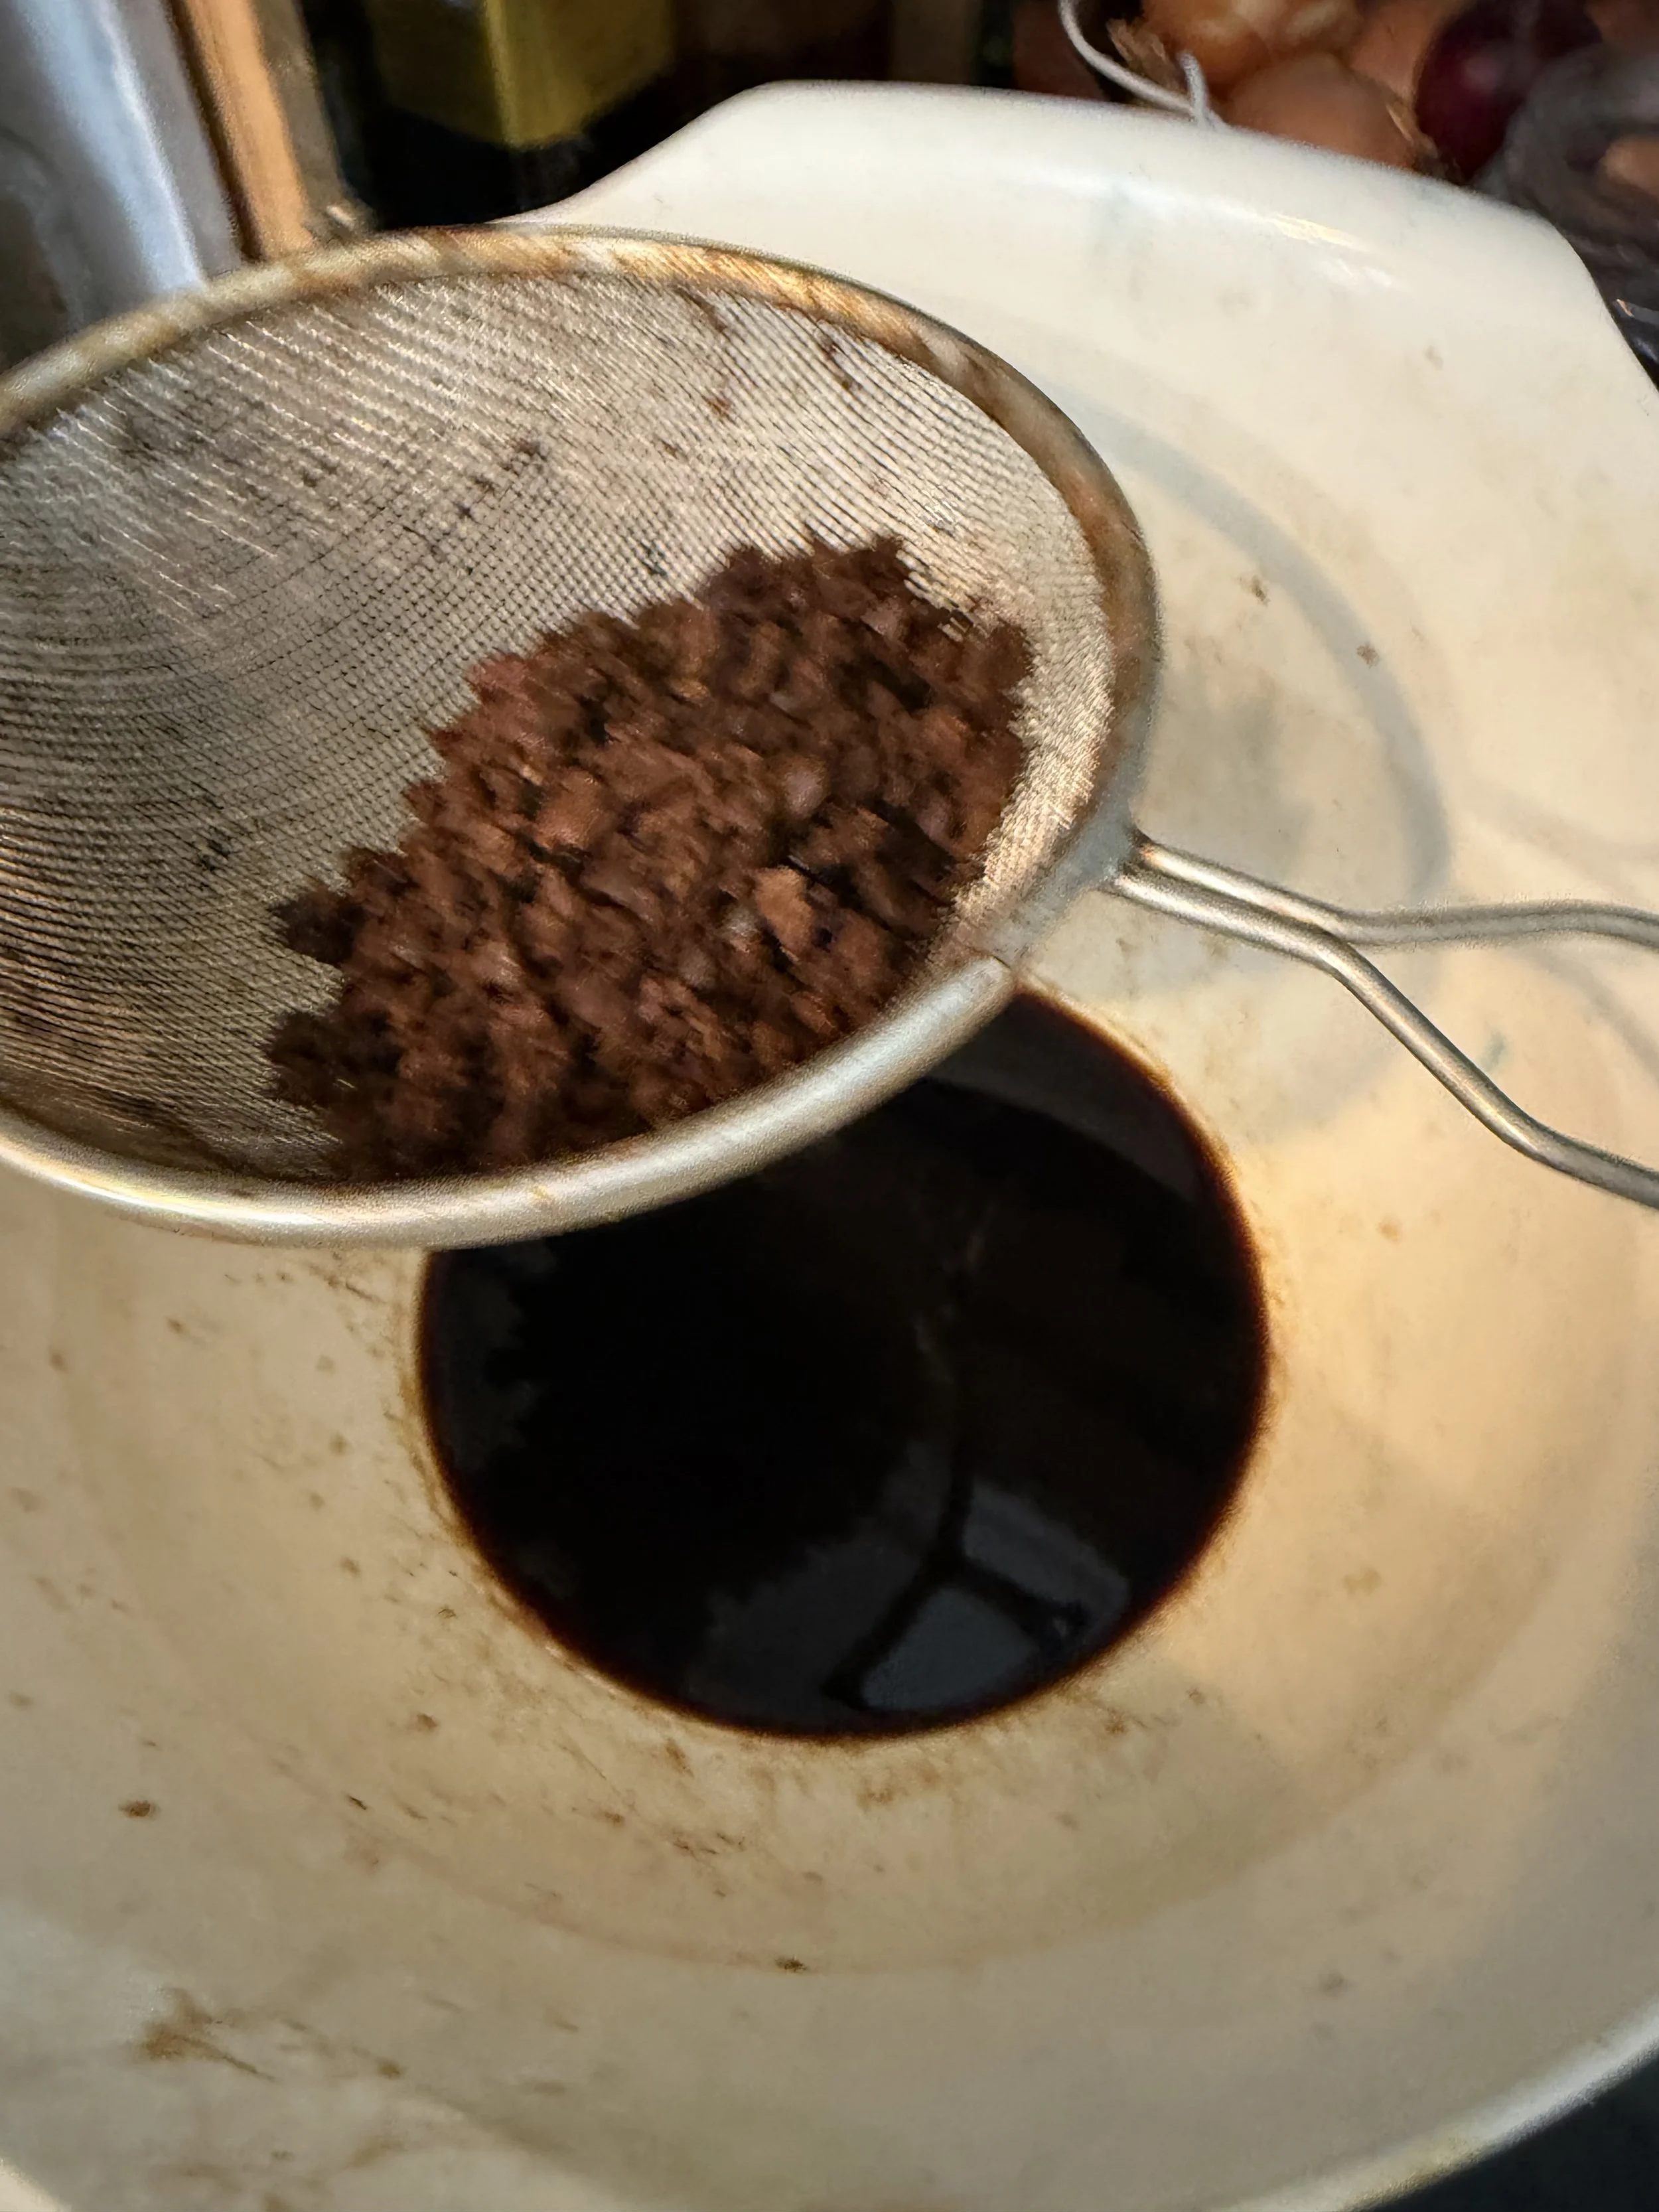
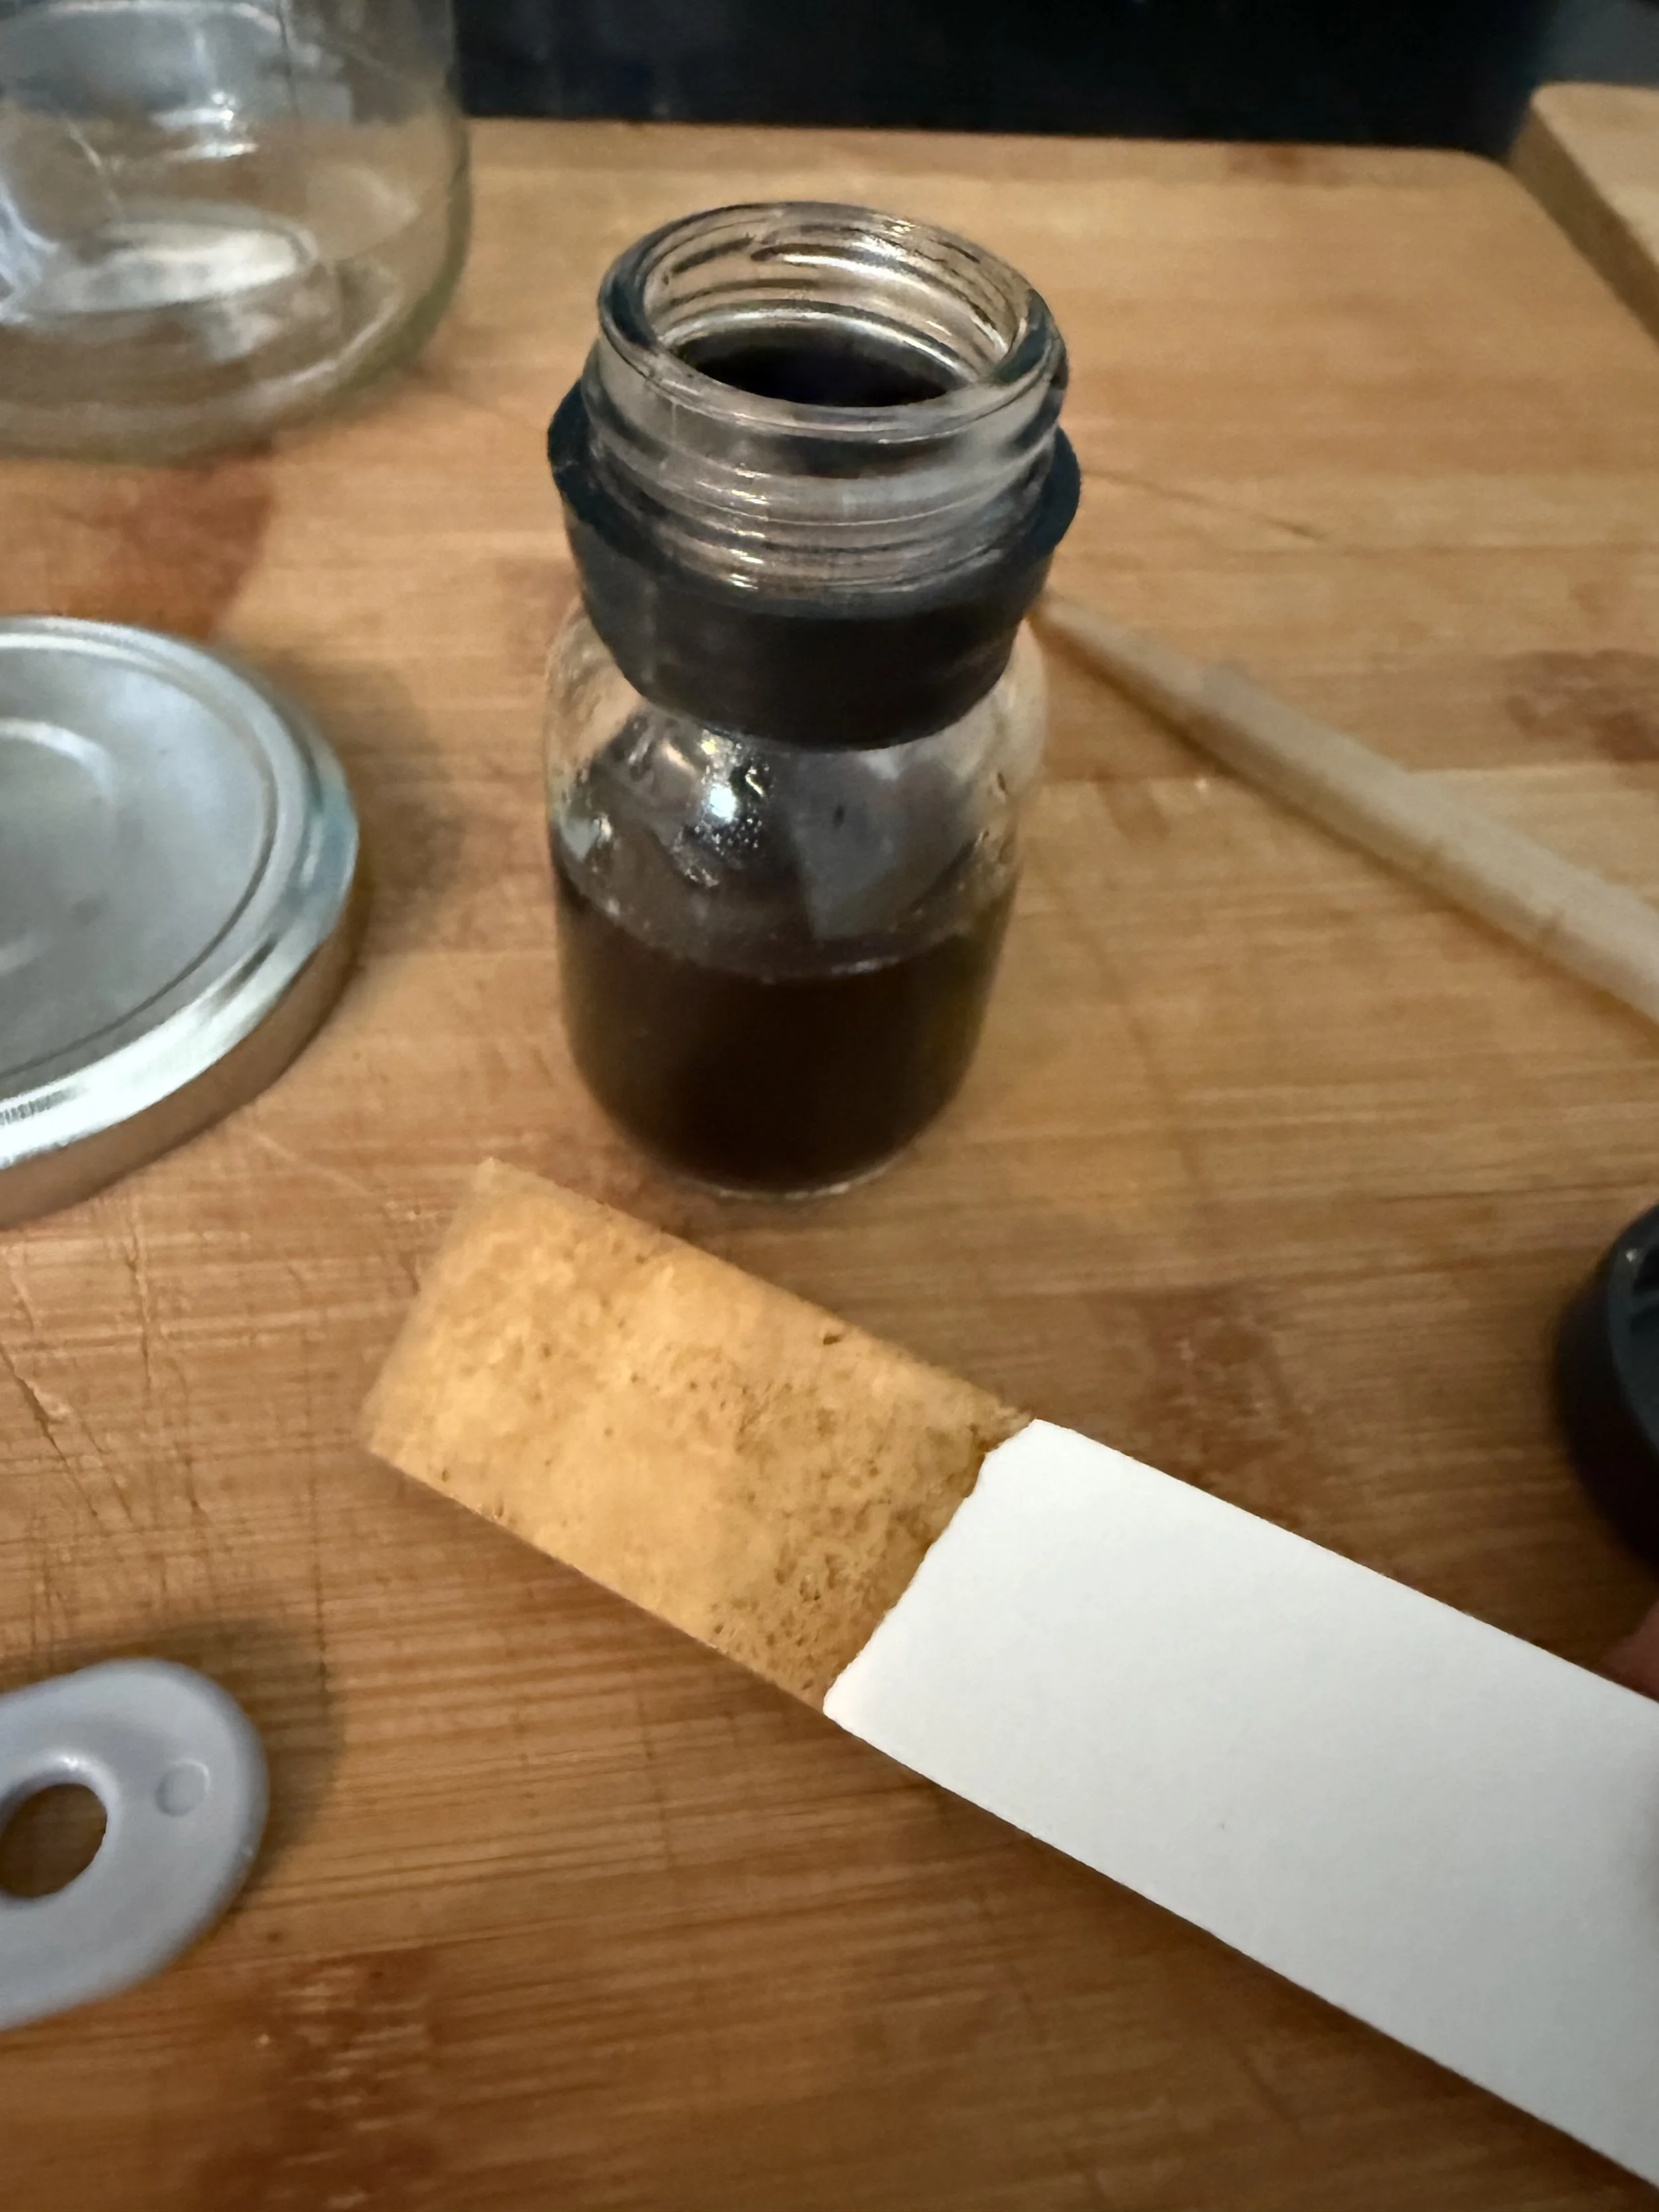
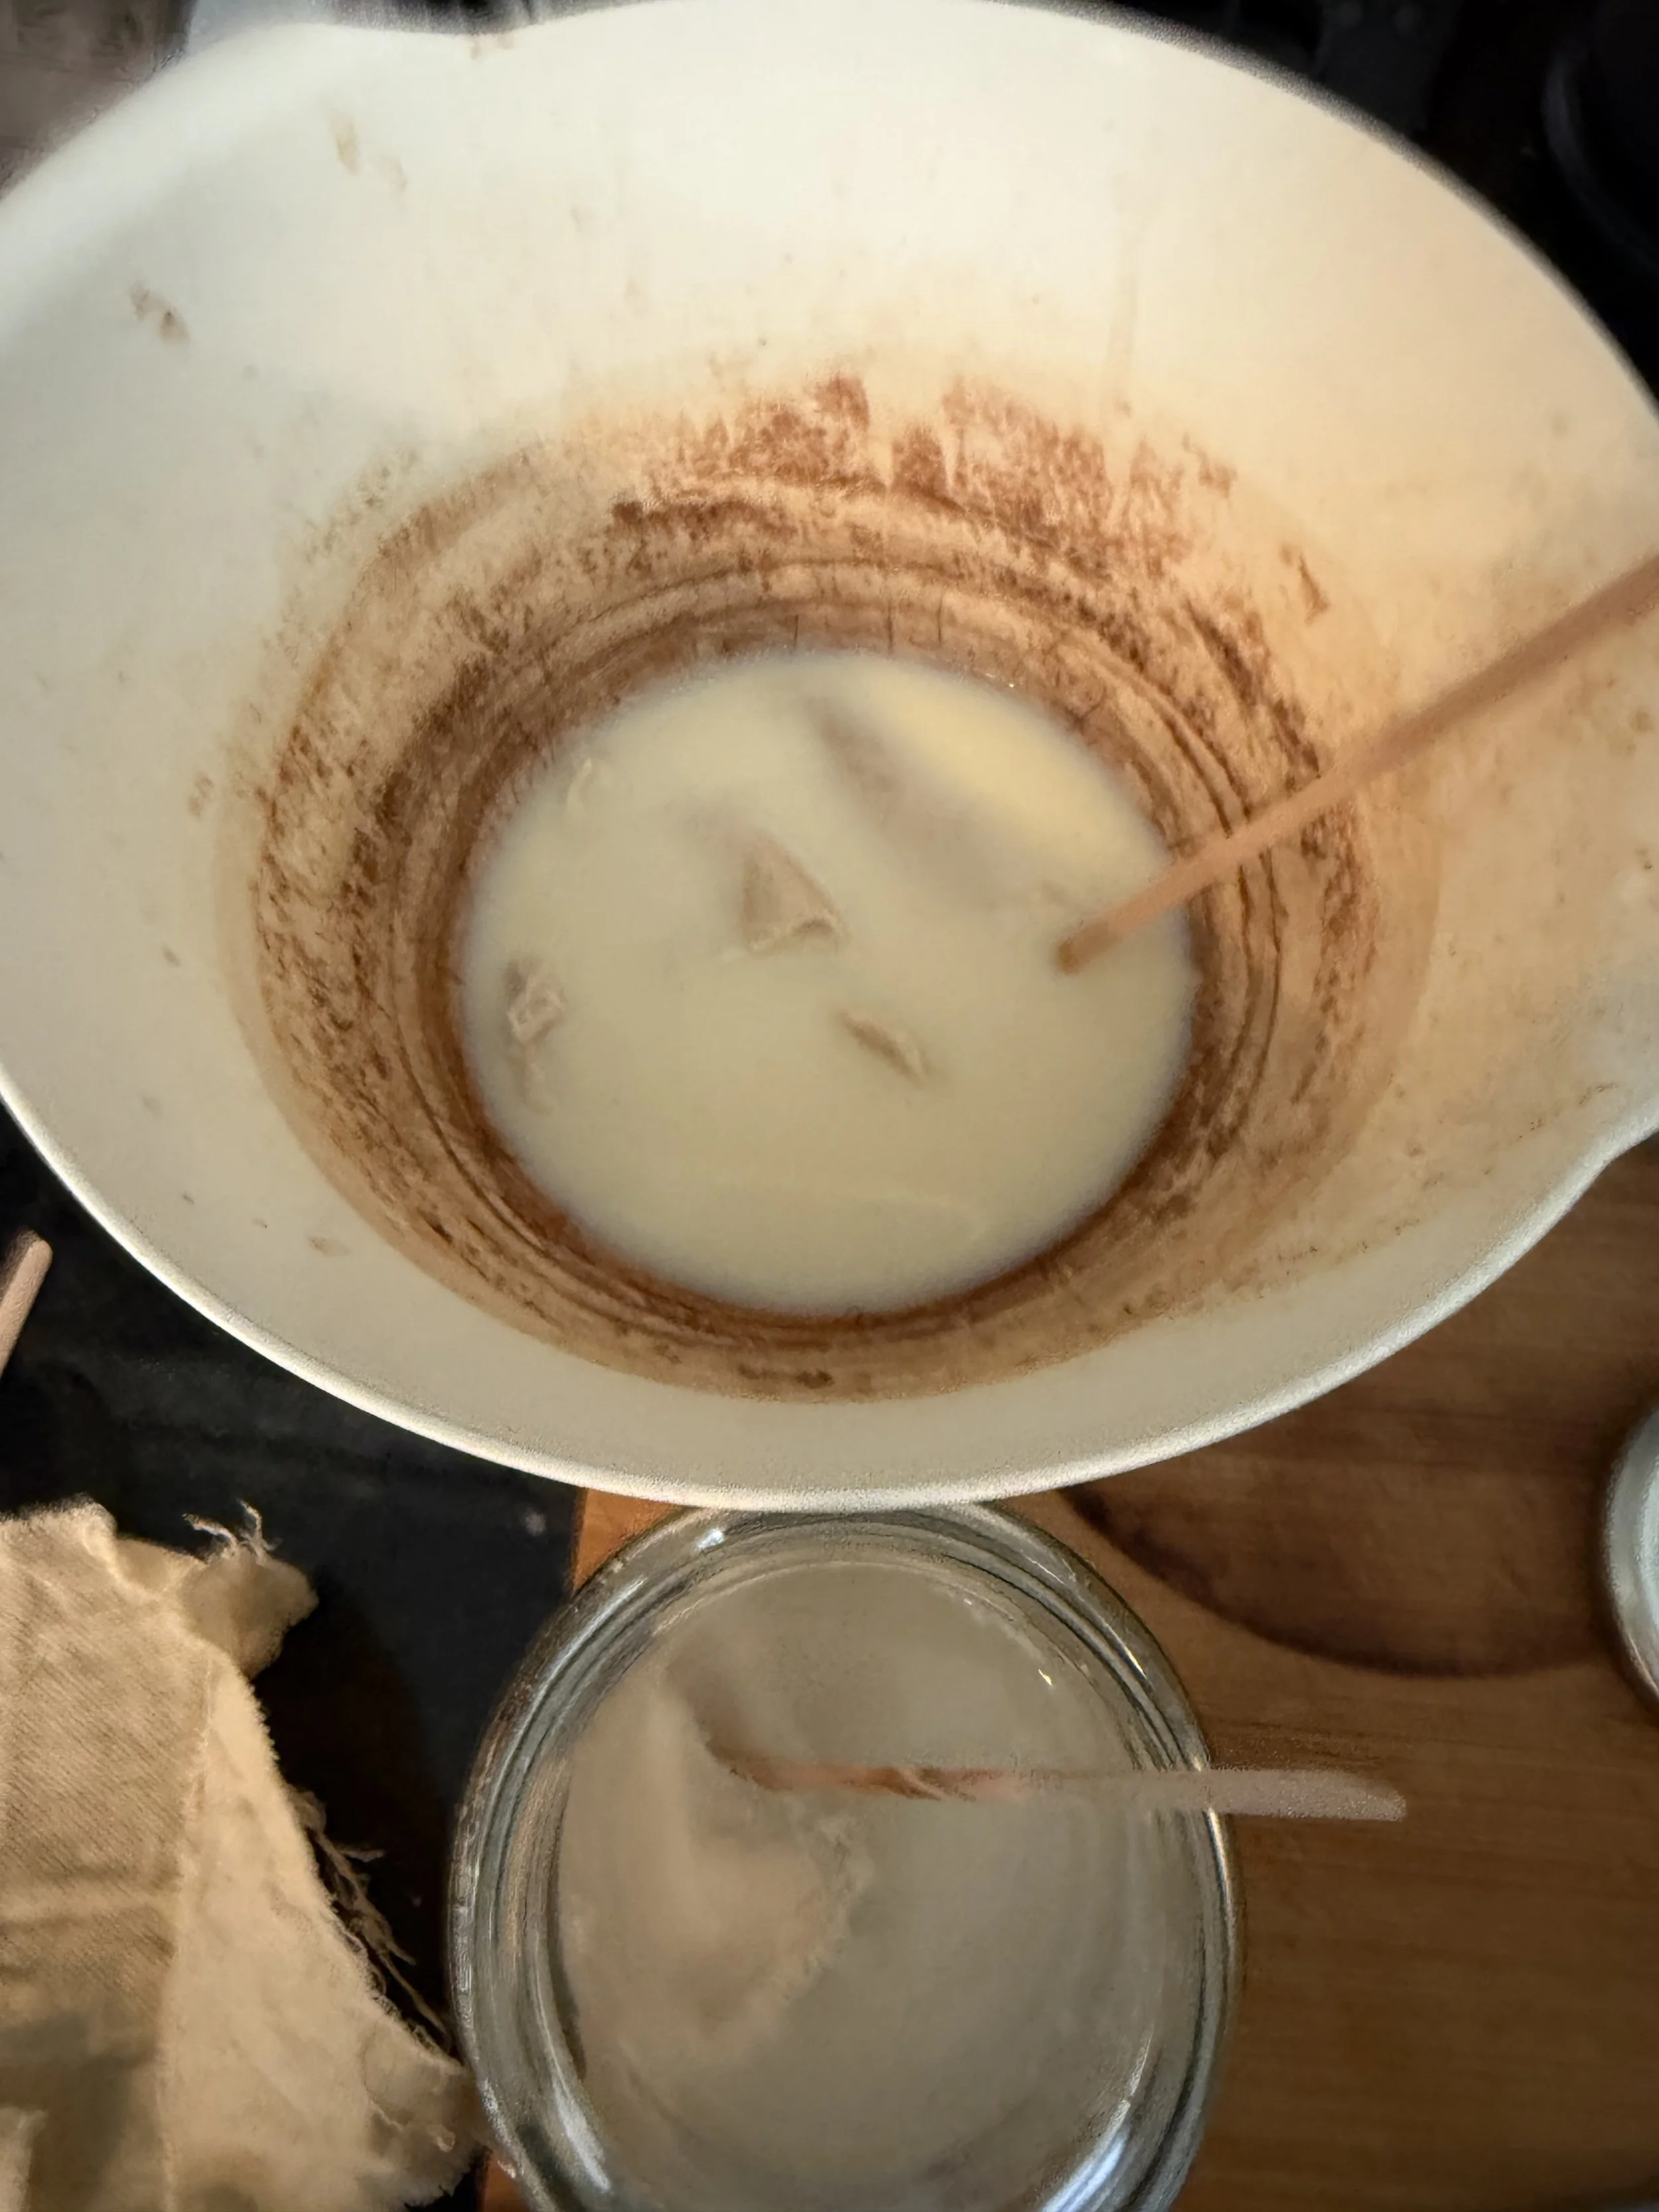
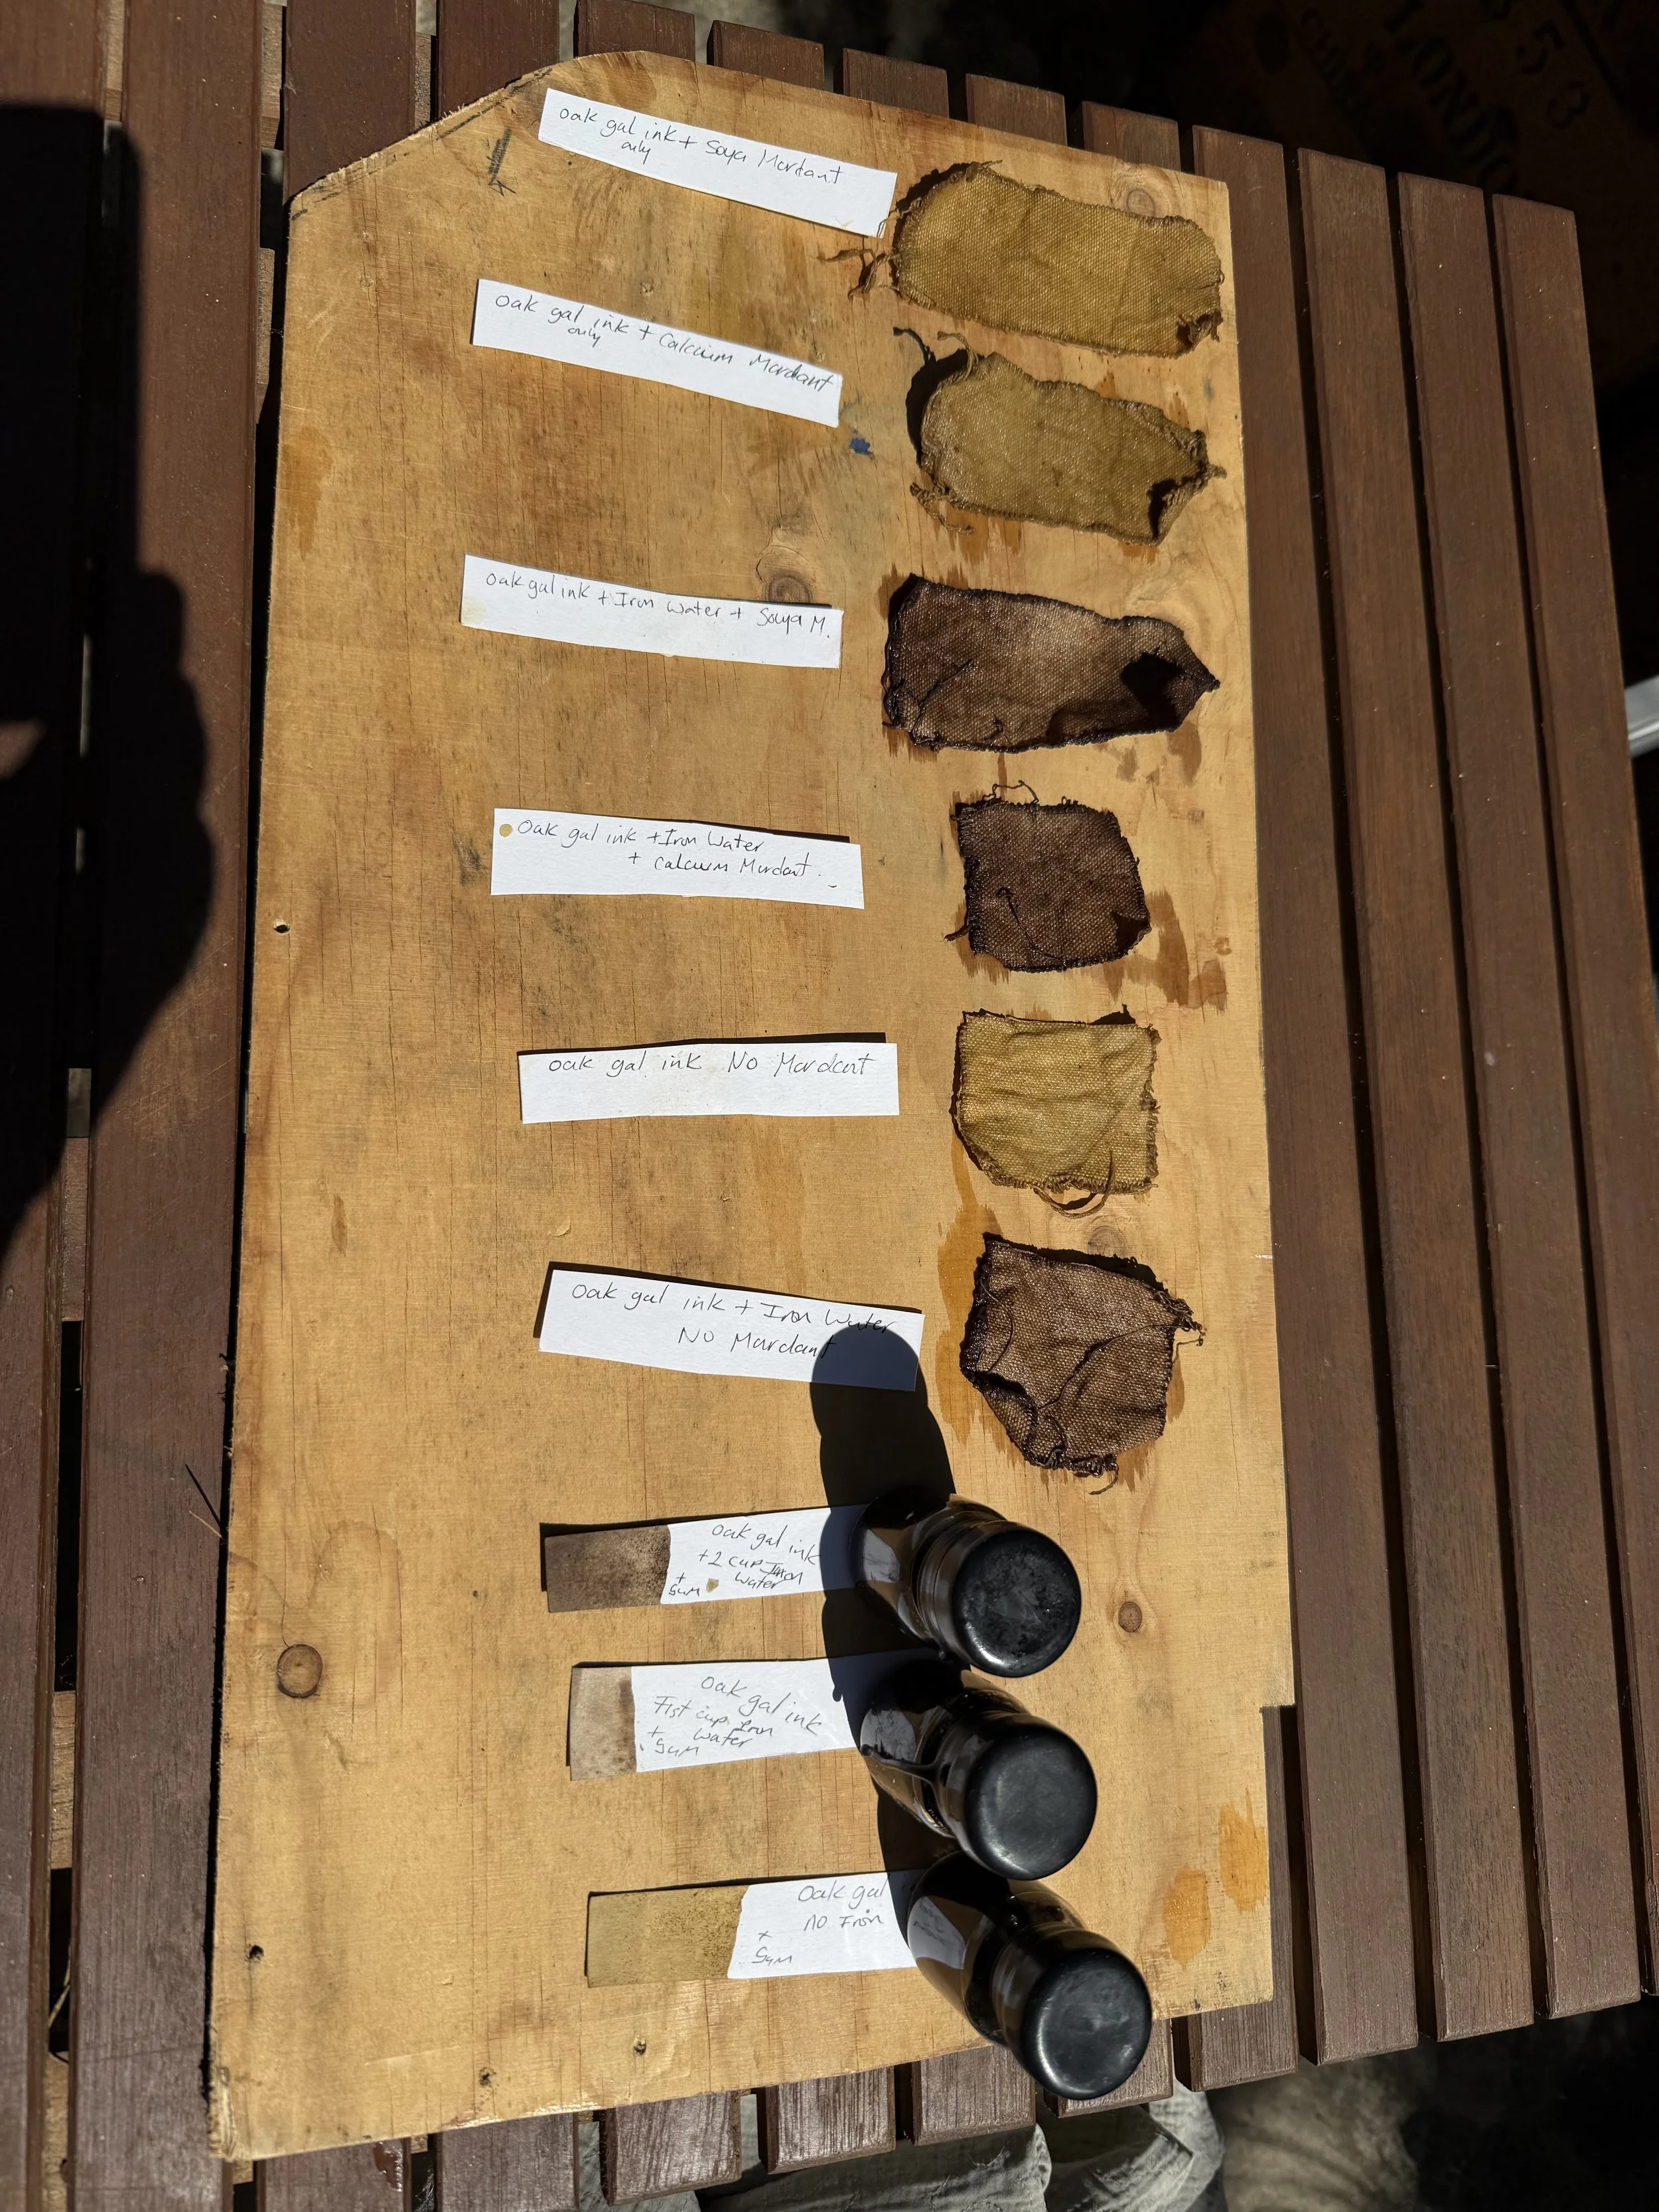
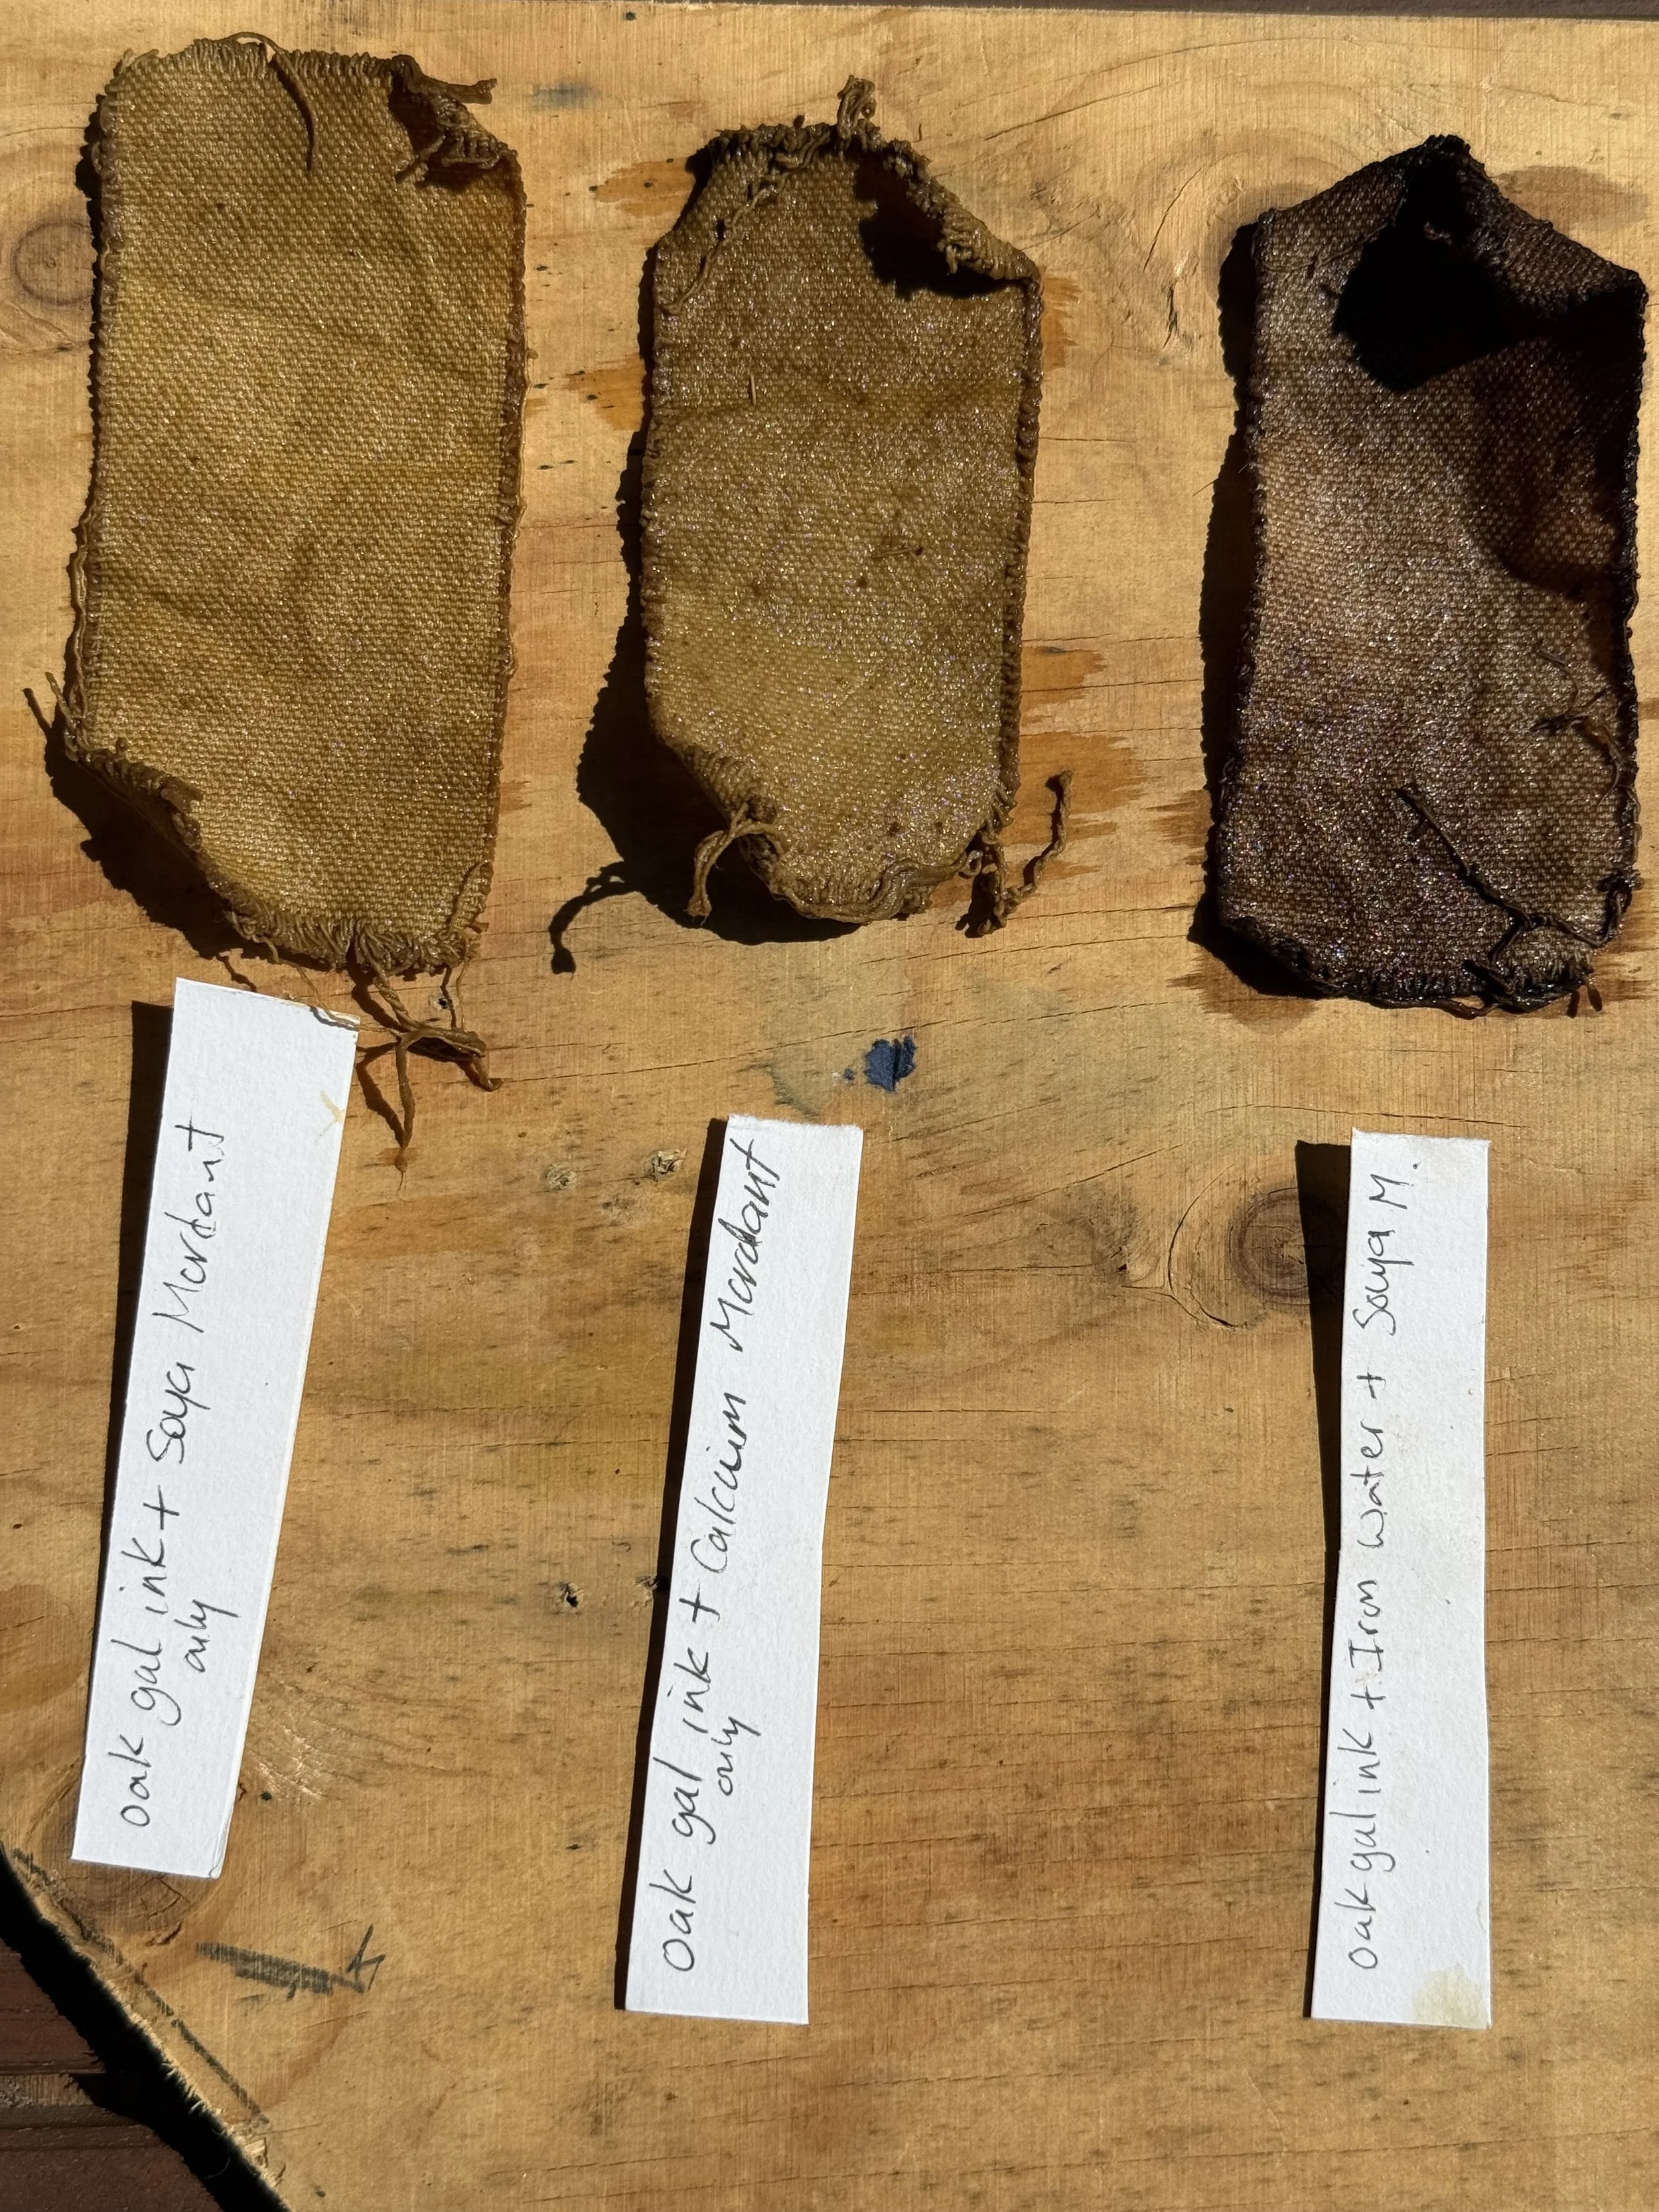
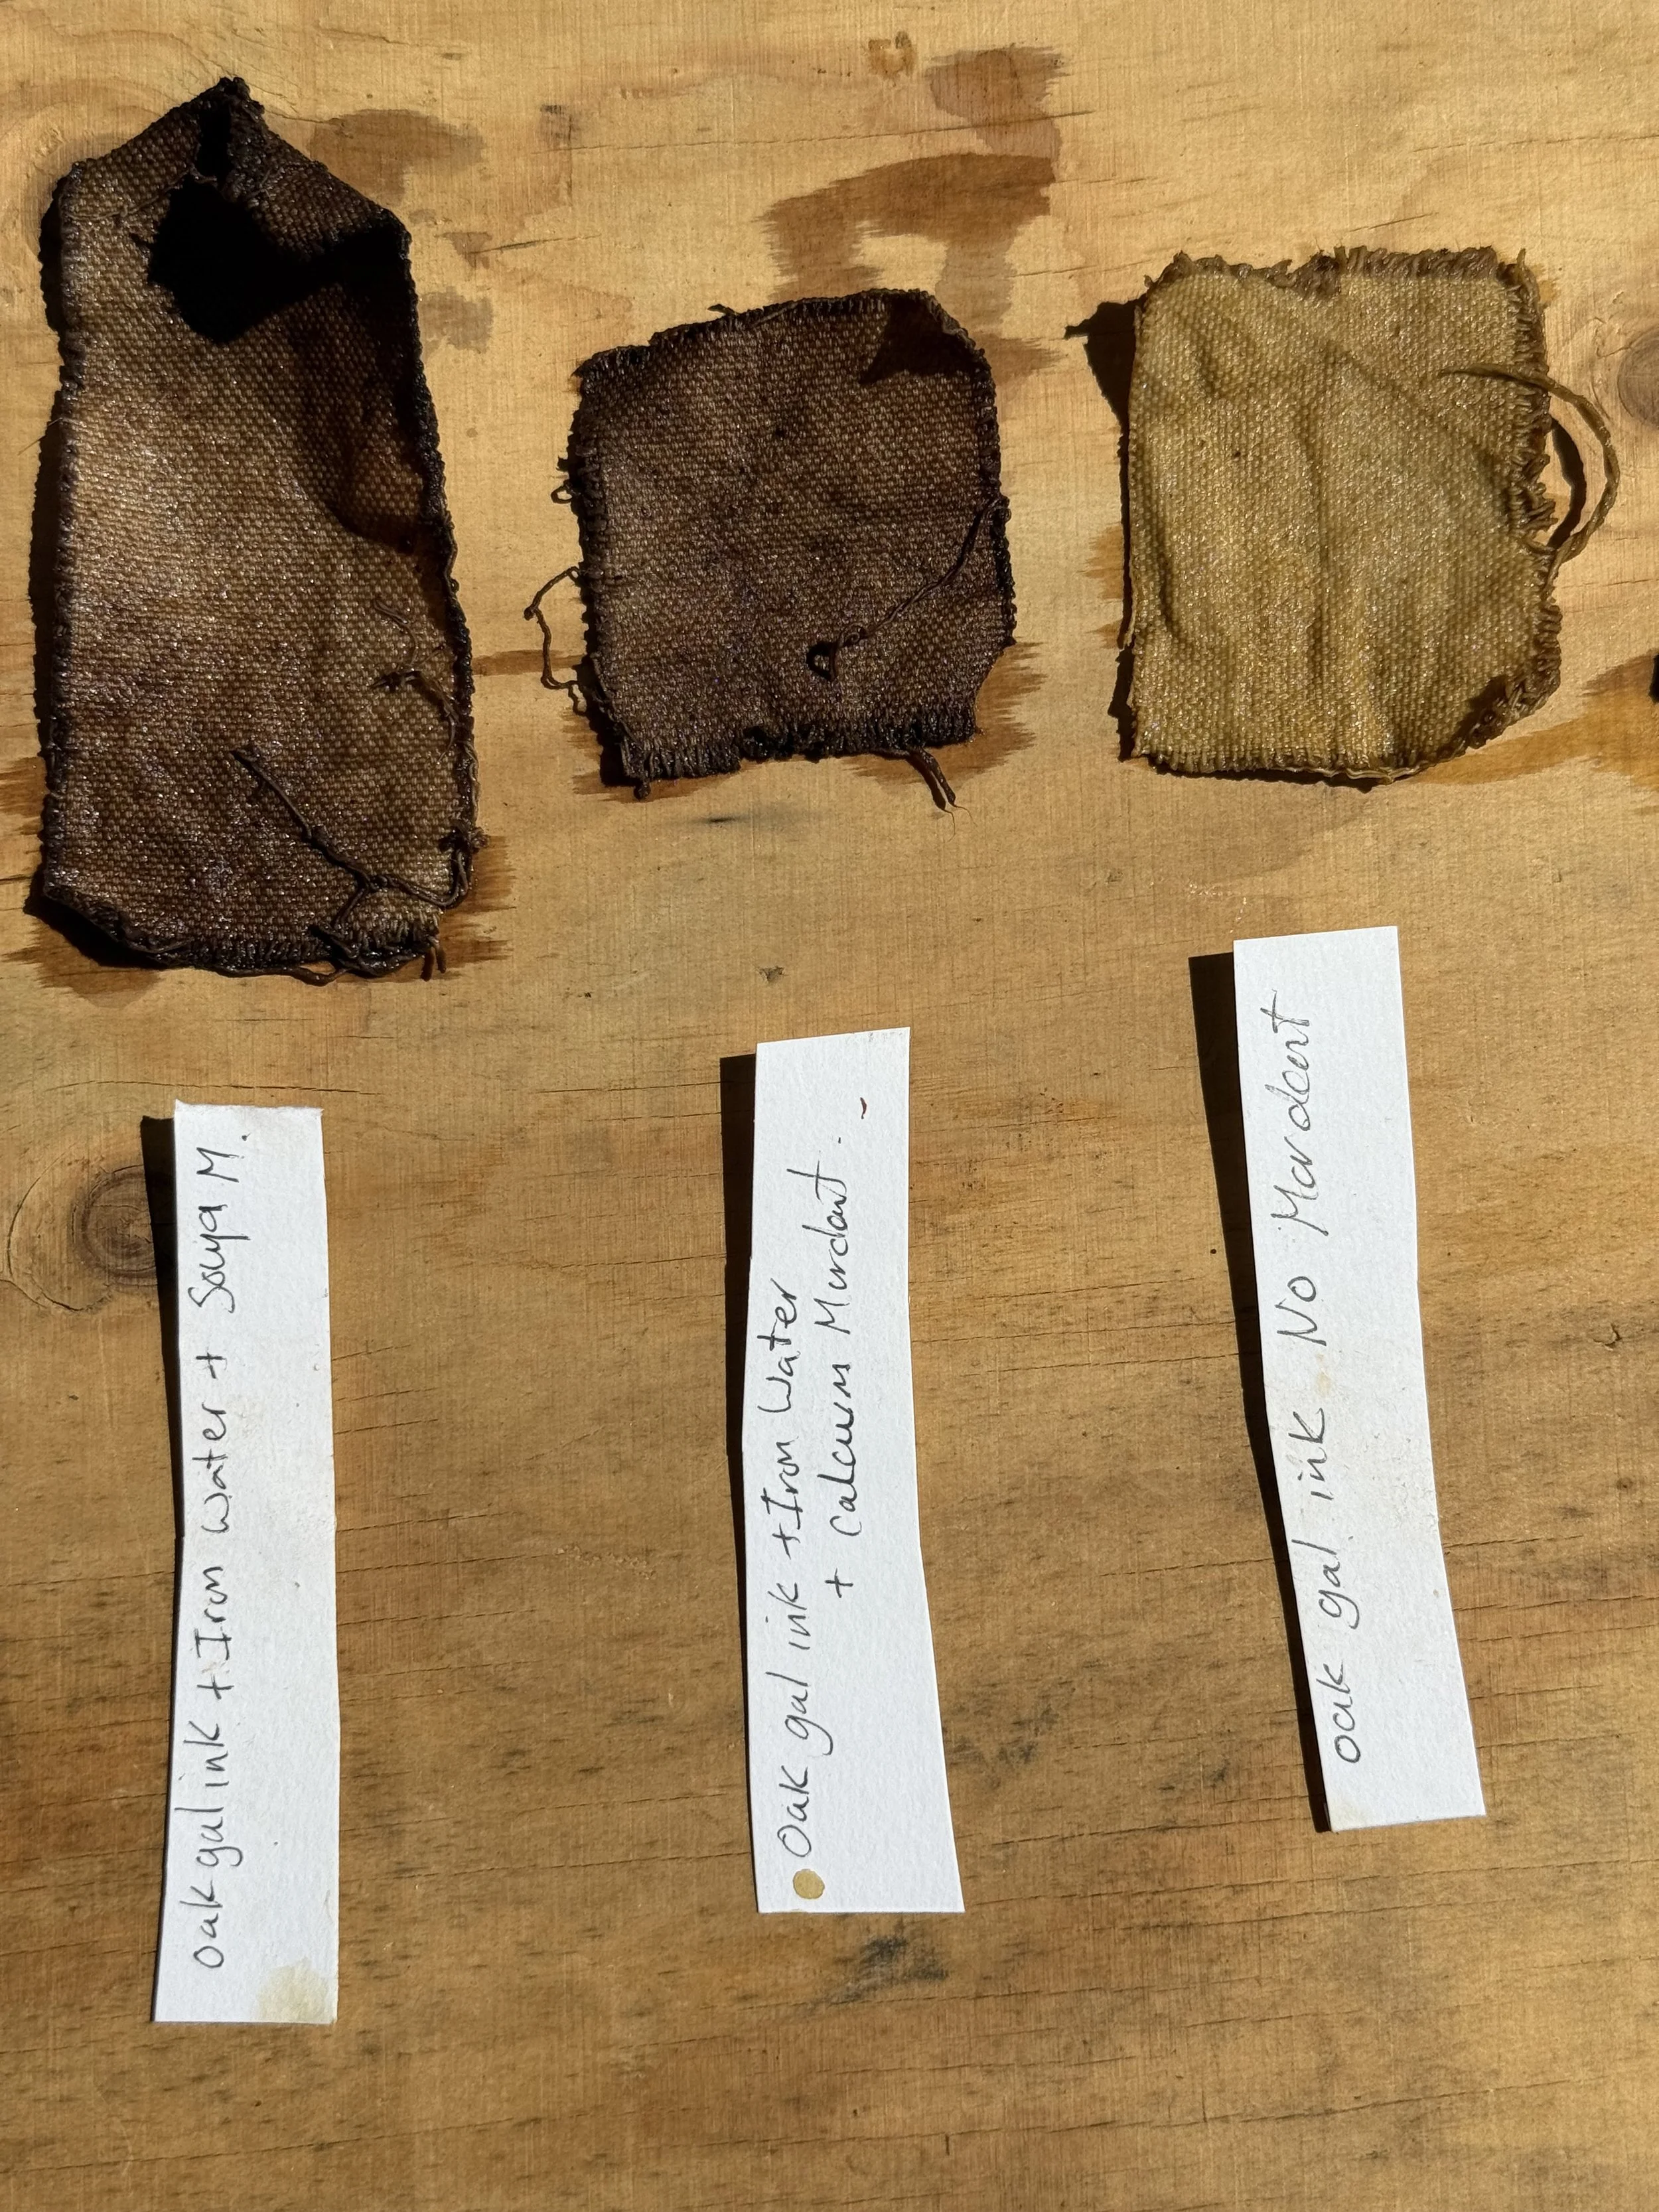
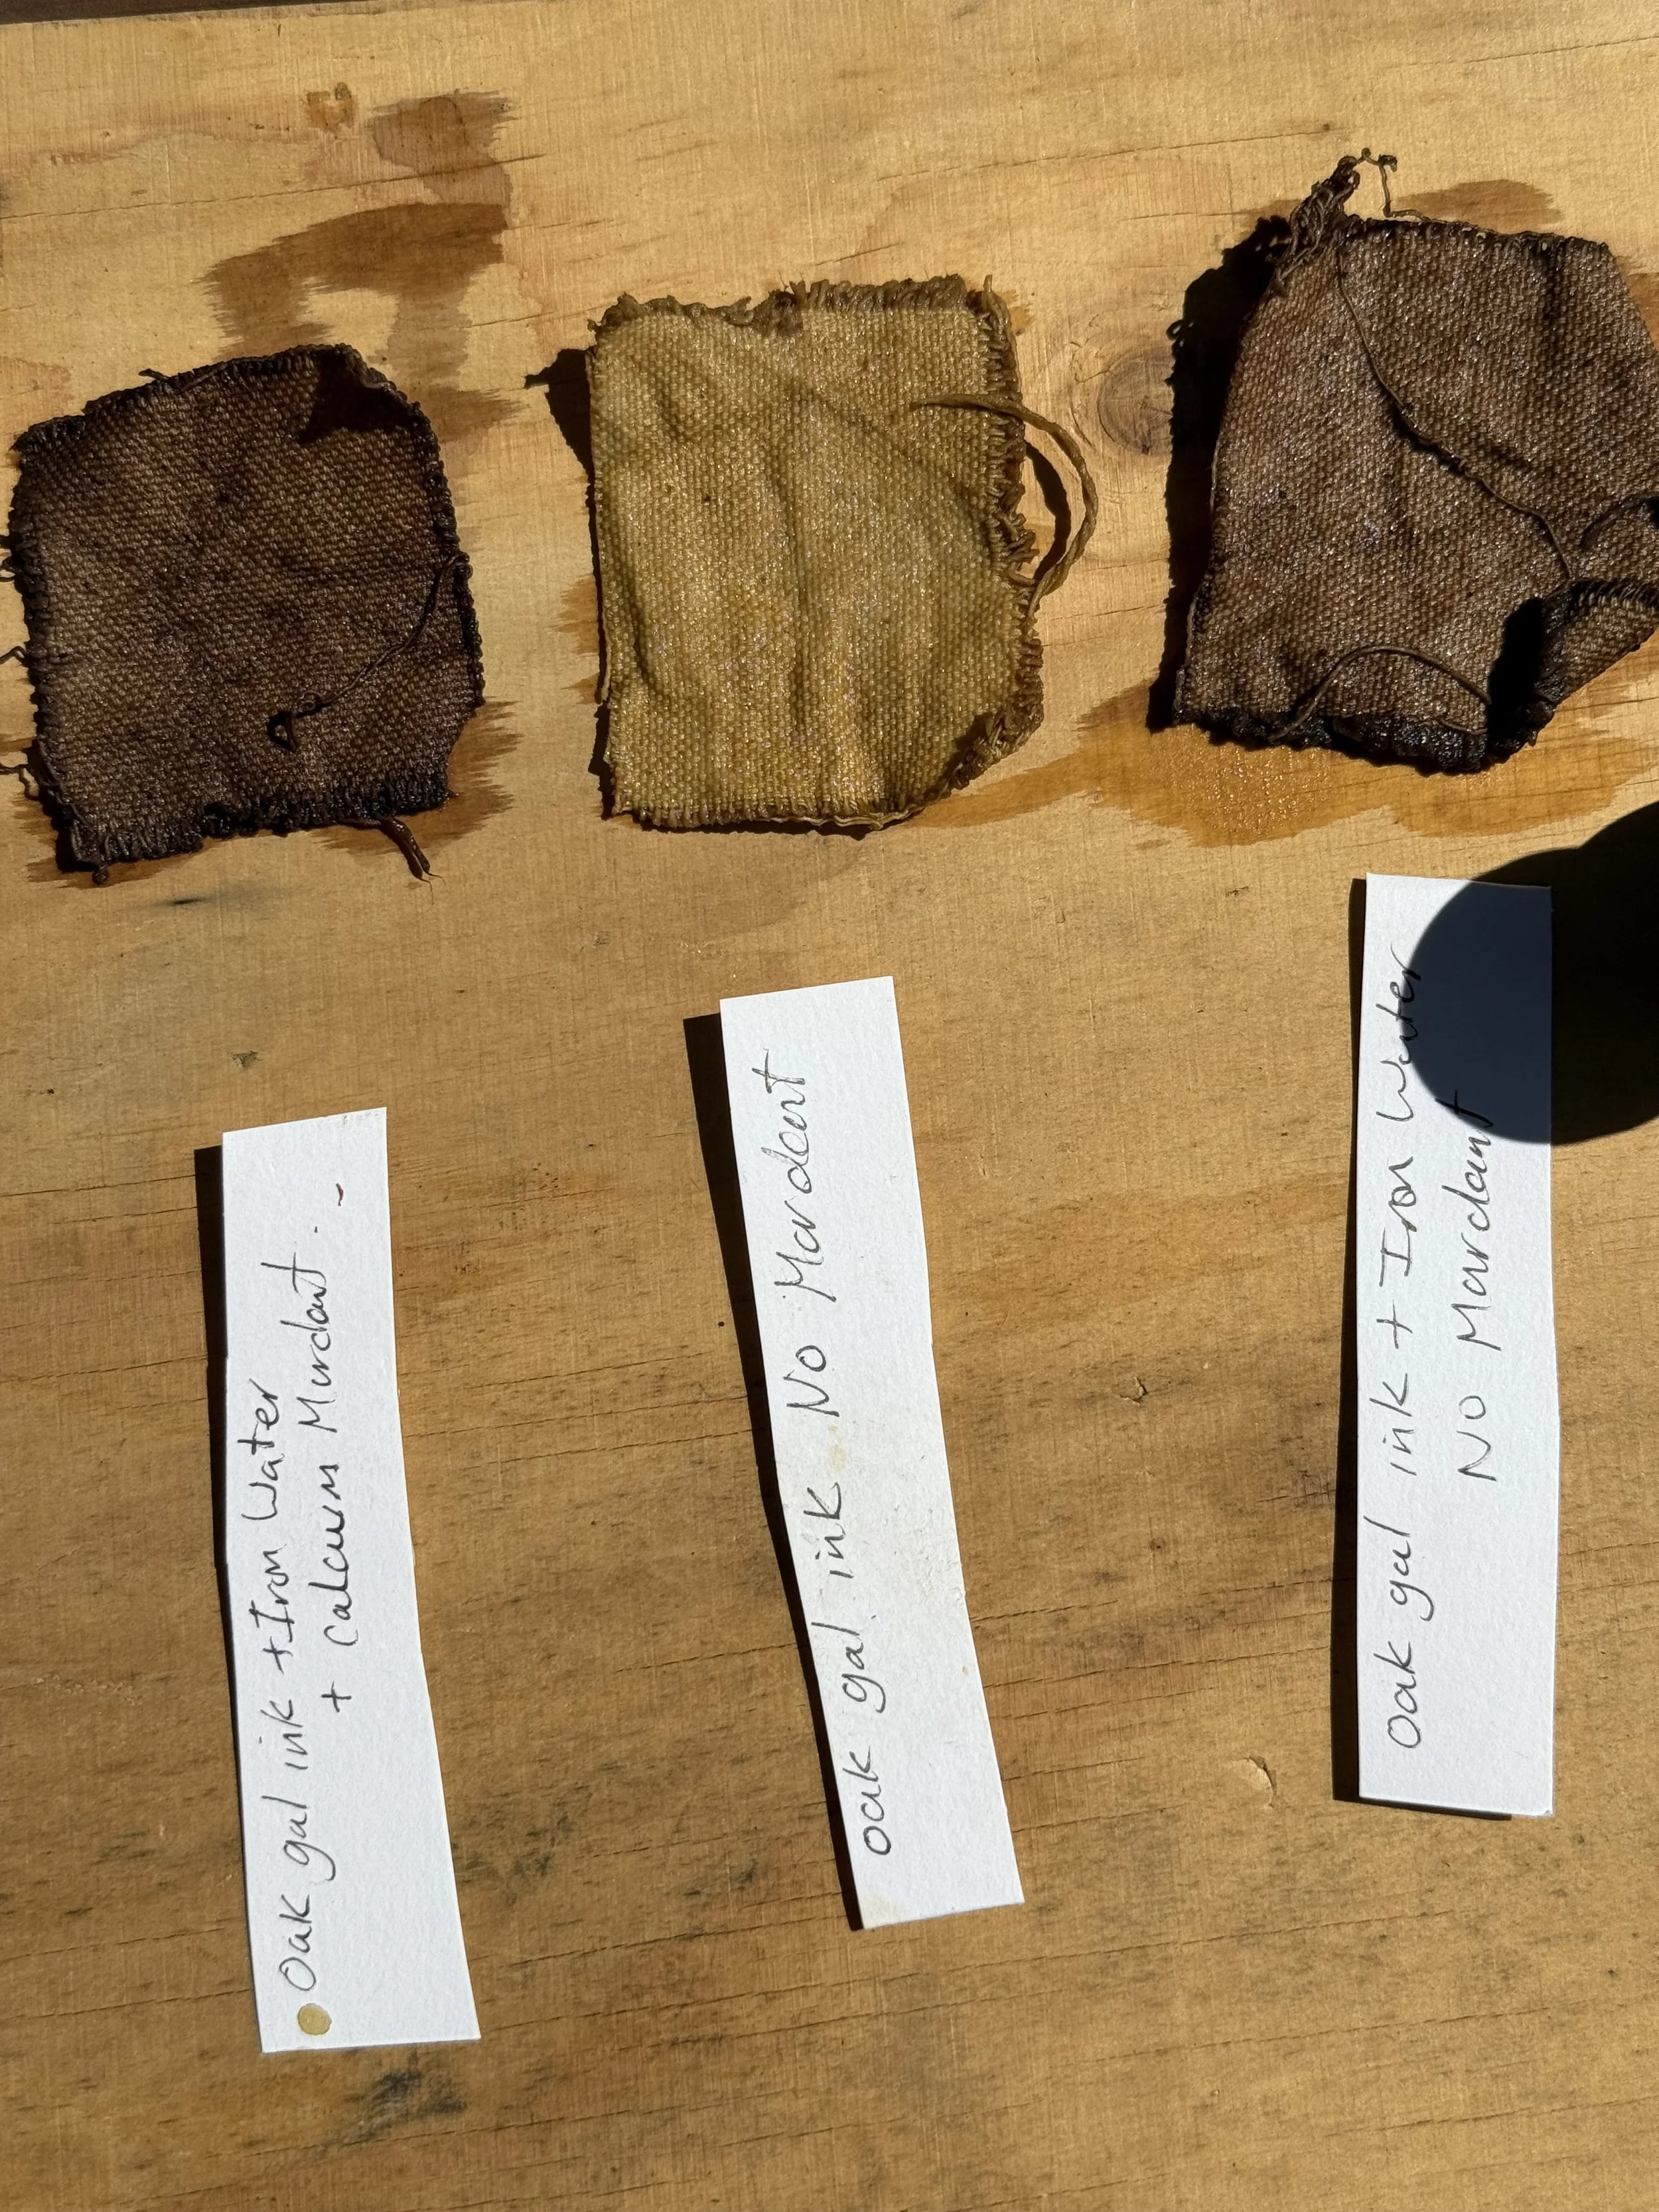
Once collected, the galls are dried and then crushed. The fragments are soaked in water for several days or simmered for a few hours to extract their tannins. To this infusion, I add a source of iron, traditionally rusted nails or iron sulfate, which reacts with the tannic acid to produce a deep, rich black. A small amount of gum arabic is added to improve the ink's flow and adhesion to the page.
The result is a velvety, archival-quality ink, beautiful for calligraphy, drawing, and writing, with a slightly earthy scent and a subtle variation of tone as it dries.
Each pot in the photos has a different mix of natural elements to give differetn tones and shades. The canvas was dipped in each ink after either just being wash, or washed and mordented with soya milk or Calcium carbonate. There was aslo a happy accident where I have discoved I could also use this ink as a cyanotype base fro prints, as the rock holding the canvas down while they dried shows this effect.
A Deep History
Oak gall ink has been used for over a thousand years. It was the standard ink of scribes and scholars across medieval Europe and the Islamic world. From illuminated manuscripts to the drafts of da Vinci and the signatures on royal decrees, oak gall ink wrote the foundations of history. Its permanence and resistance to fading made it ideal for important documents, some of which still survive with striking clarity today.
By learning this ancient method, I’m not only embracing a sustainable, low-impact way to create, I'm also connecting to a lineage of makers and record-keepers who understood that nature itself could be the truest source of permanence.